Disclaimer: Some links on this page are affiliate links. This means that, if you click through the links and make a purchase, I may earn a small commission at no additional cost to you.
The alpine stitch is a deceptively simple technique that creates a bold, eye-catching texture that stands out beautifully at a glance. It creates a dense, structured fabric that naturally curls as you work. This is completely normal and happens because you’re placing double crochet stitches around the posts of stitches from two rows below.
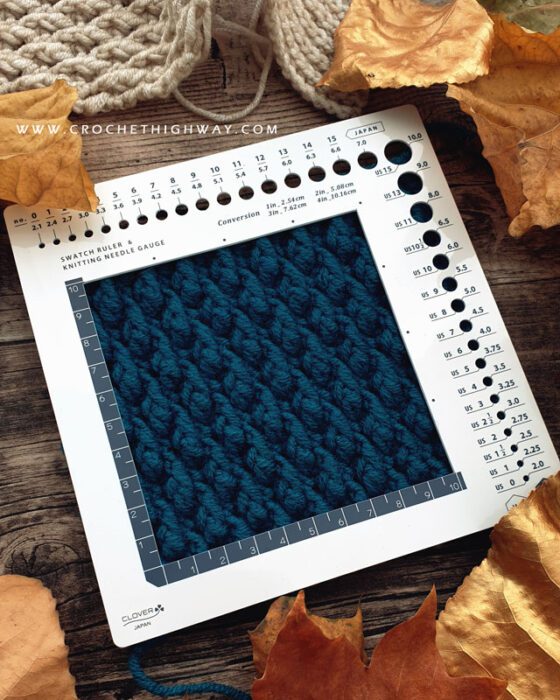
In many ways, that curling is simply part of the stitch’s character. The very structure that causes the fabric to curl during construction is what gives it such a smooth, fluid, and drapey finish once blocked. For this reason, blocking is essential whenever you’re working with the alpine stitch. In fact, I often suggest lightly blocking your work mid-project to relax the fabric, reduce the curl, and better evaluate your progress. A quick blocking session can help you clearly see the overall look, determine the current length, and decide whether you need to crochet additional rows or not. Read my comprehensive guide on how to block your crochet pieces here.
Cosmopolitan Shawl. Pattern and design by CrochetHighway.
The alpine stitch is normally a 4-row repeat. In my patterns you’ll sometimes have to work complete repetitions of the 4 rows, or incomplete repetitions where you end the last repeat on row 2.
This photo tutorial uses standard US crochet terminology.
Stitch glossary & abbreviations used in this tutorial:
CH: chain SC: single crochet DC: double crochet FPDC: front post double crochet; yarn over and insert hook around post of indicated stitch from front to back and to front again, pull up a loop (3 loops on hook), [yarn over and pull through 2 loops on hook] twice
The alpine stitch only really consists of a. front post double crochet stitches (FPDCs) plus regular double crochet stitches (DCs) on the one hand, and b. single crochet stitches (SCs) on the other hand. We alternate between these 2 types of rows to create the alpine stitch pattern.
Let’s crochet a small swatch as an example of a 4-row repeat of the alpine stitch. The rows written in bold and underscored are alpine stitch repeats.
With your main hook, start with a foundation chain of 20 (or a multiple of 2).
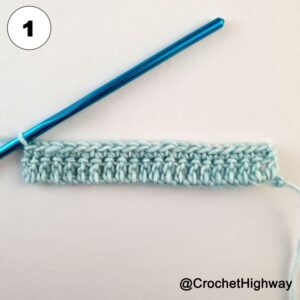
Setup row 1: CH 2 (does not count as stitch here and throughout), DC in 3rd CH from hook and in each CH across. Turn. [20 DC]
Setup row 2: CH 1 (does not count as SC here and throughout), SC in each DC across. Turn. [20 SC]
Setup rows 1 and 2 (photo 1) are not part of the pattern repeat. They are the “foundation” we need to get the alpine pattern started.
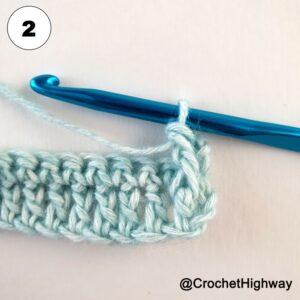
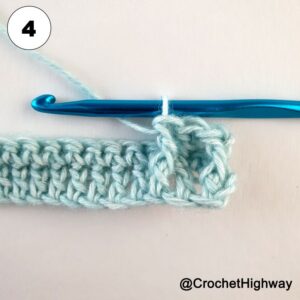
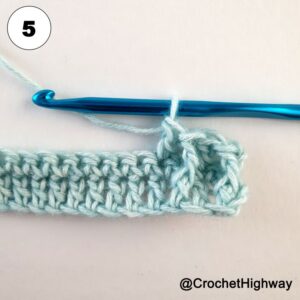
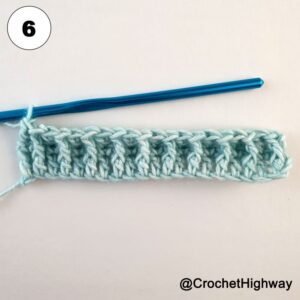
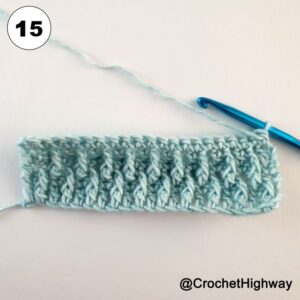
Row 1: CH 2 and skip the beginning CH 2 from the previous row, FPDC around first DC from 2 rows below (photo 2). *On the previous row skip next SC and DC in next SC (photo 3), on 2 rows below skip next DC and FPDC around next DC (photo 4). Repeat from * across (photos 5–6). Turn. [10 FPDC, 10 DC]
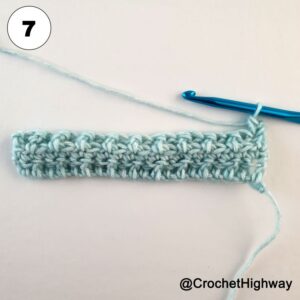
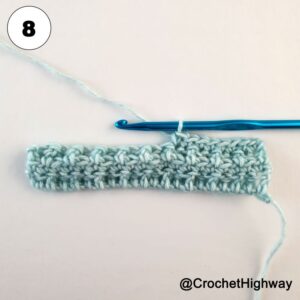
Row 2: CH 1, SC in each DC across. Turn. [20 SC]
Pro tip! If the first stitch worked 2 rows below (row 1) was a FPDC, then the first stitch on the current row (row 3) will always be a DC, and vice-versa.
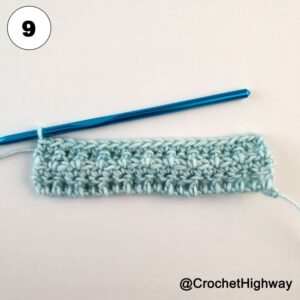
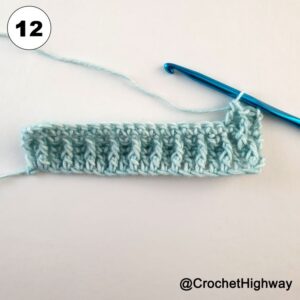
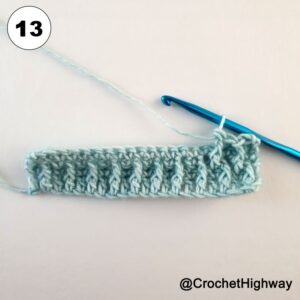
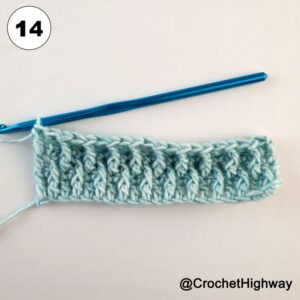
Row 3: CH 2, DC in first SC (photo 10). *On 2 rows below skip the next DC and FPDC around next DC (photo 11), on the previous row skip next SC and DC in next SC (photo 12). Repeat from * across (photos 13–14). Turn. [10 DC, 10 FPDC]
Row 4: CH 1, SC in each DC across. Turn. [20 SC]
Rows 5–16:Repeat rows 1–4 three more times.
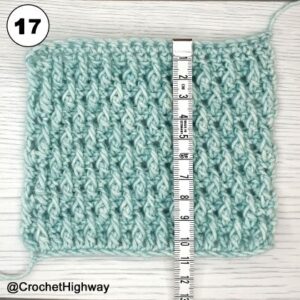
Pro tip! For a proper gauge measurement, the gauge swatch is intended to be a little larger than 4 by 4 inches (10.16 by 10.16 cm), so you can measure your stitch/row count properly. Read my comprehensive guide on how to crochet a gauge swatch and measure your gauge for successful garment making!
Remember:
Every FPDC is worked around a DC from 2 rows below.
Every regular DC is worked in a SC from the previous row.
When working the regular DC stitches, regularly check to make sure you’ve skipped one single SC from the previous row, otherwise you’ll unintentionally increase your stitch count!
While you’re here, check out some of my recently published crochet patterns and stitch tutorials!
I’d LOVE to see your work, so be sure to shout out to me @CrochetHighway on Instagram and use the #CrochetHighway hashtag for a chance to be featured on my stories!