The Let It Snow Cowl
Free Crochet Pattern
Reversible interlocking crochet you can wear
Disclaimer: Some links on this page are affiliate links. This means that, if you click through the links and make a purchase, I may earn a small commission at no additional cost to you.
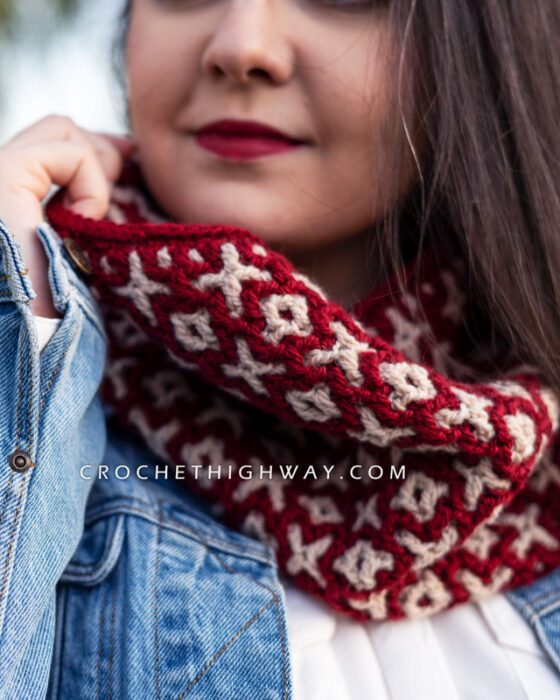
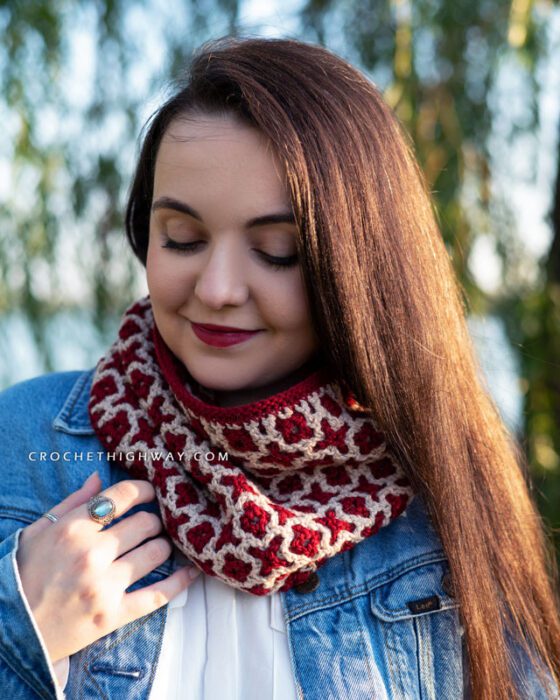

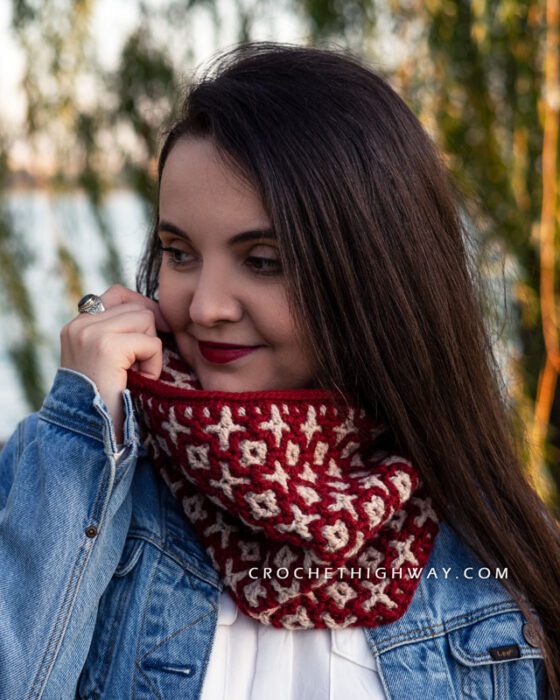
The Design
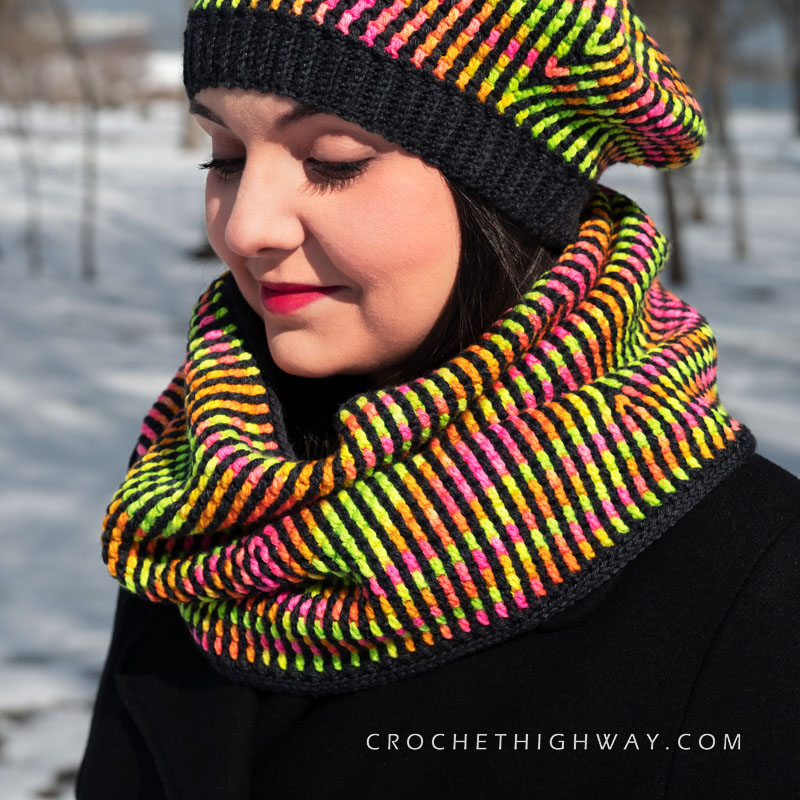
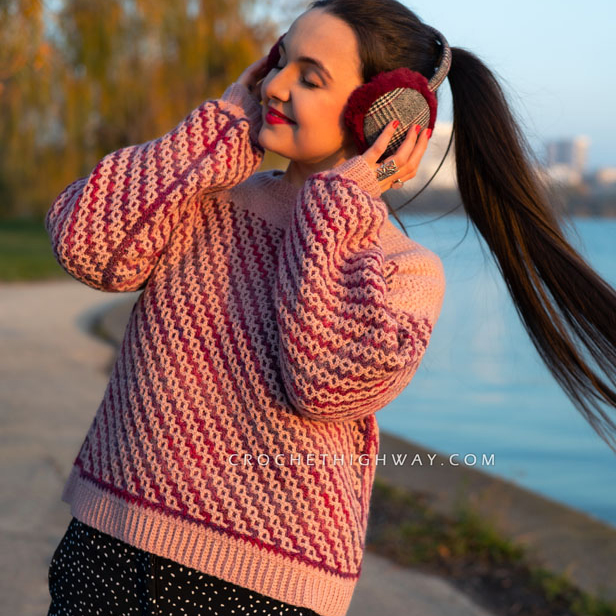
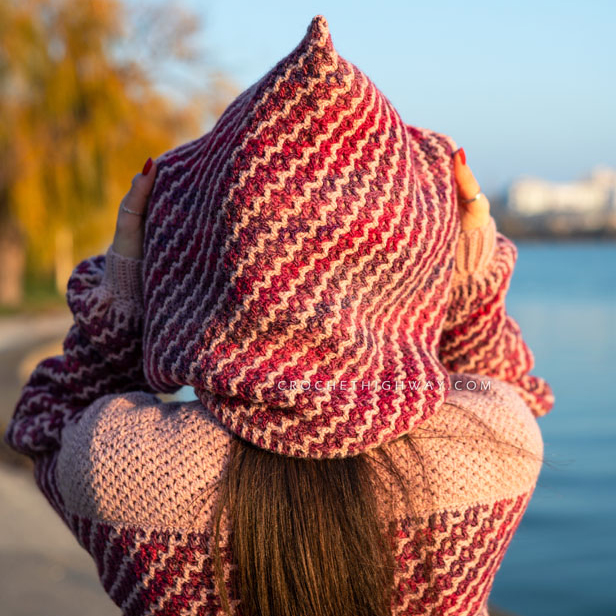
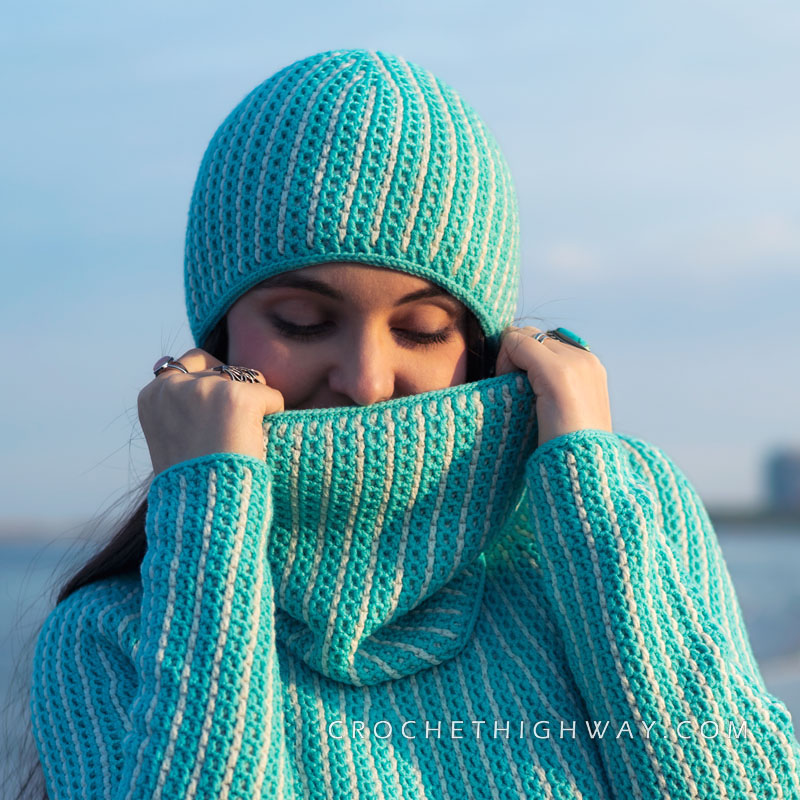
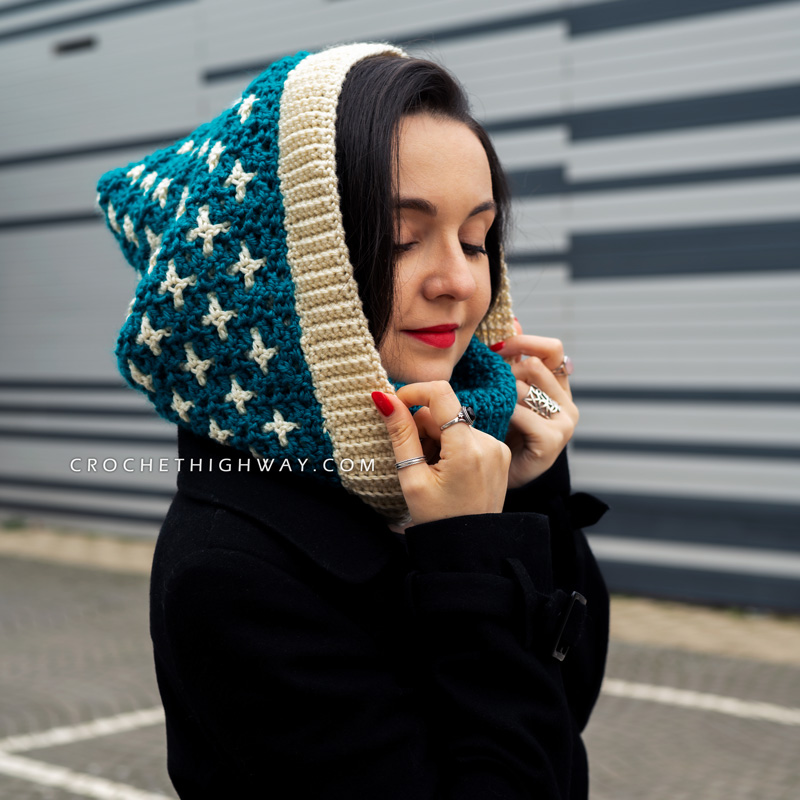
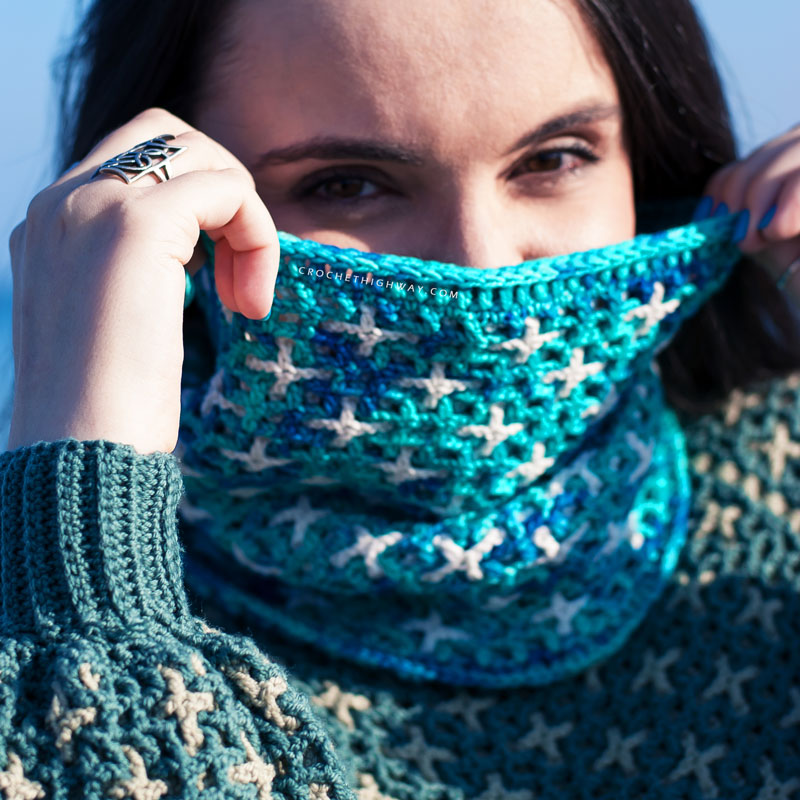
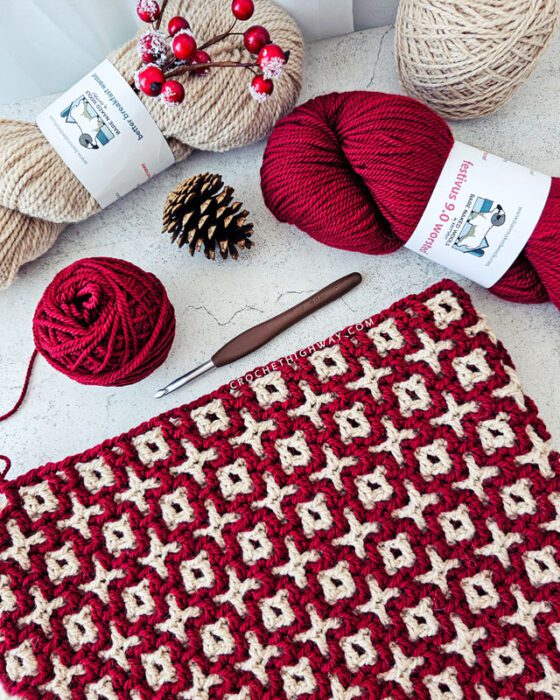
Get ready for the festive season with this reversible interlocking cowl!
Worked seamlessly in the round entirely on the right side, this cowl will amaze you by how simple it is to crochet.
The pattern walks you through all the steps through detailed instructions and tutorial photos, so you can confidently complete this project even if you never tried your hand at interlocking crochet before.
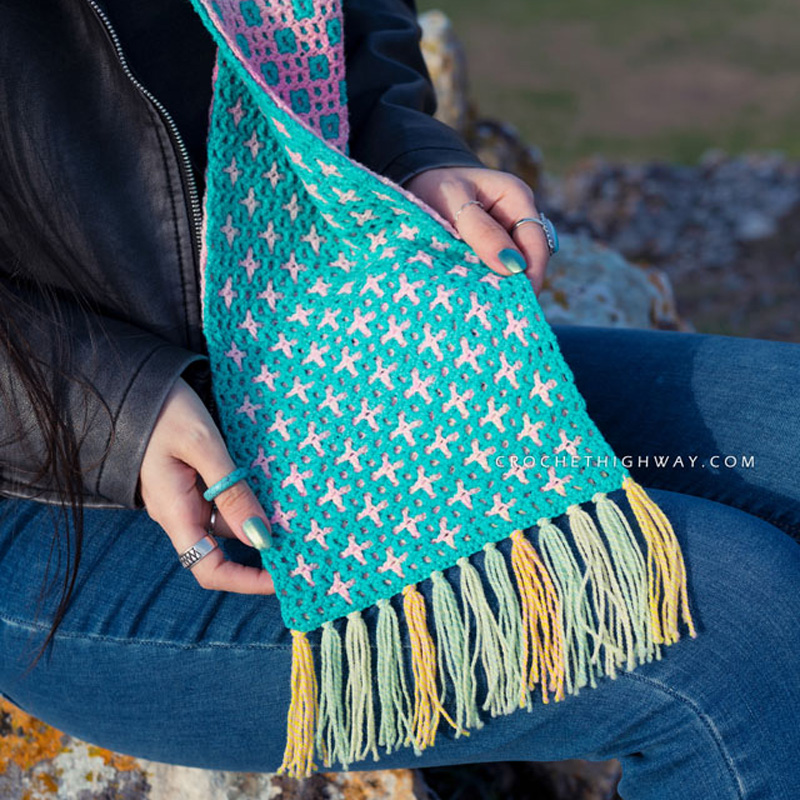
The best thing about this cowl is that you achieve a unique, reversible colorwork fabric without ever having to work with more than 1 color at the same time. That’s right! At the start of a round, you always drop the inactive yarn and pick up the new color on your hook, making this the easiest colorwork project you’ve ever made!
MEASUREMENTS
Cowl circumference: 21.25 (22.75, 25.25) inches or 54 (58, 64) cm
Cowl height: 8 (9.5, 11) inches or 20 (24, 28) cm
DIFFICULTY
Intermediate
MATERIALS
Yarn:
Worsted or DK weight yarn in at least 1 main color (MC), and 1 contrast color (CC). Animal fibers such as merino or alpaca are ideal for a warm and cozy cowl for the cold season, and plant-based fiber blends, such as cotton + bamboo, will work great for a lighter accessory that can be worn during spring.
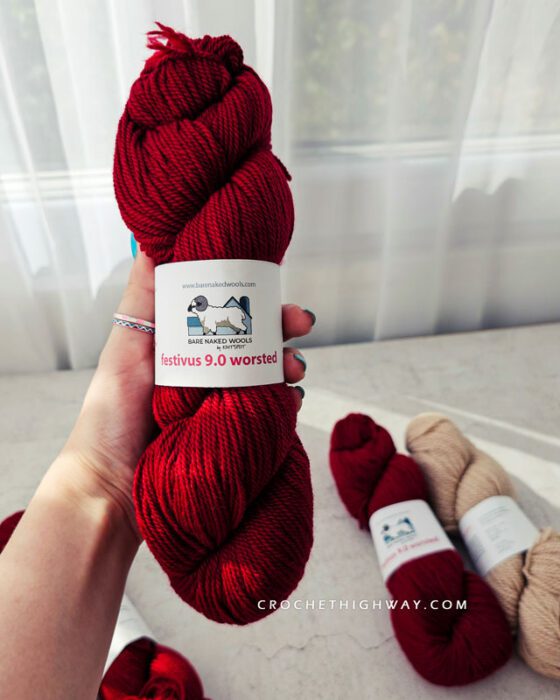
My sample is shown in Bare Naked Wools Festivus 9.0 Worsted (3-ply, 100% merino wool, 225 yds / 205 m per 115 g) in “Red Flannel” as MC, and Bare Naked Wools Better Breakfast Worsted (2-ply, 65% merino, 35% dehaired alpaca, 225 yds / 205 m per 115 g) in “Milk and Honey” as CC.
The WPI of both these yarns is 10, although the Festivus 9.0 feels ever so slightly heavier.
Learn how to measure the WPI of your yarn here.
Hooks: 6.0 mm hook (main gauge), 5.0 mm hook (detailing), or sizes needed to obtain gauge.
I used my Clover Amours. I’m a tight crocheter, so you may have to go down in hook sizes.
Notions: Tape measure, scissors, darning needle, 2 stitch markers.
YARDAGE
The approximate yardages are:
Main color (red):
1 hank of BNW Festivus 9.0 Worsted, or 140 (175, 225) yds / 130 (160, 205) m
Contrast color (cream):
1 hank of BNW Better Breakfast Worsted, or 75 (95, 125) yds / 70 (85, 115) m
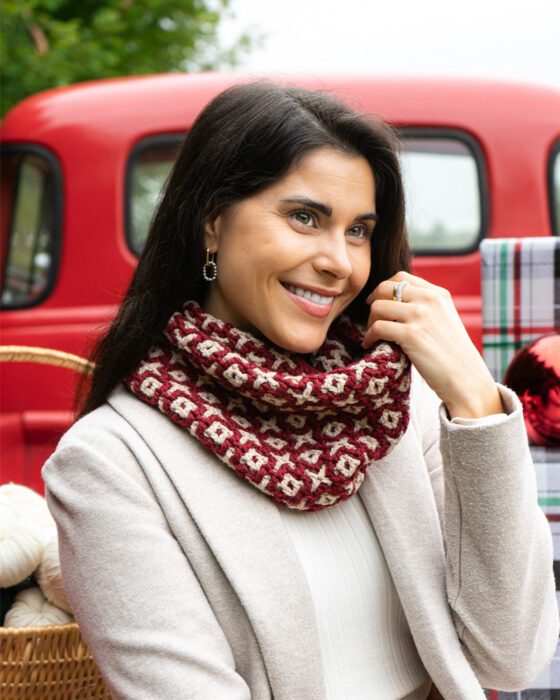
I’d LOVE to see your work, so be sure to tag me @CrochetHighway on Instagram and use the #CrochetHighway hashtag for a chance to be featured on my stories!
Video tutorial
This pattern comes with a complete step-by-step video tutorial, which you can check out right now on my YouTube channel! While you’re there, why not also subscribe to my channel for more interlocking crochet tutorials? The video demonstration is great for learning how to crochet this reversible stitch, and it’s a great opportunity to also check your gauge at the same time.
Yarn SUBSTITUTION Ideas
Looking for yarn substitution ideas? Here’s a list of alternative yarns you can try!
Tester lookbook
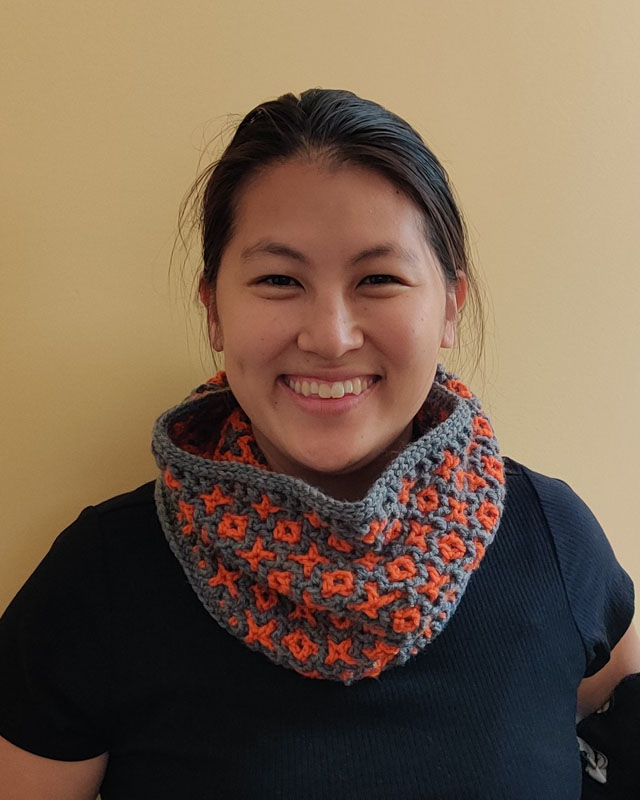
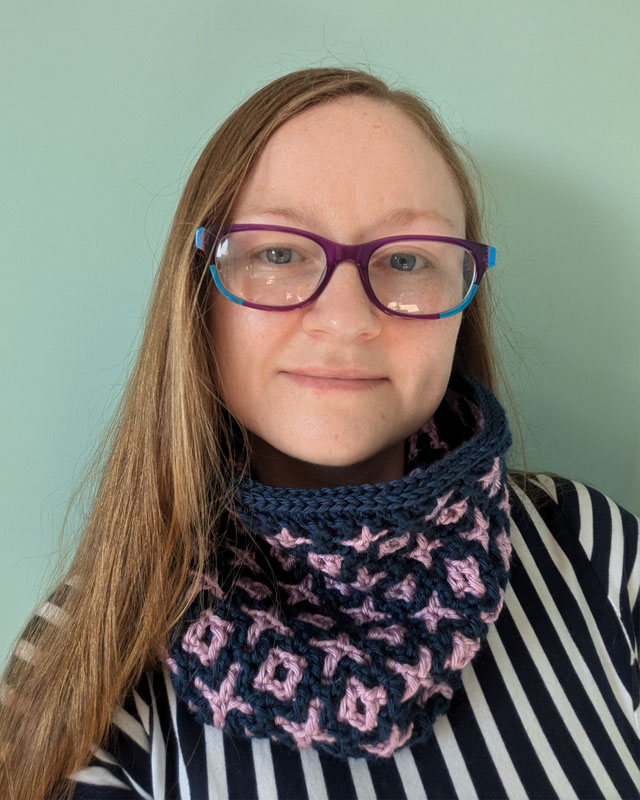
My patterns would not be so smooth without the input of my team of talented testers. Swipe left & right for more photos of your favorite versions!
Want to test my future patterns? Check out how you can become a pattern tester for CrochetHighway!
Nicole (hookedontracey on Ravelry)
Size 2, using 180 yds of Big Twist Soft as MC, and 100 yds of Big Twist Soft as CC
Hook size(s): 5 mm; 6 mm
Mods: None.
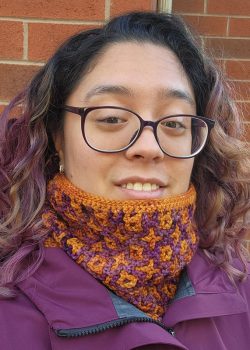
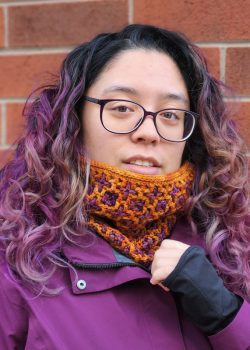
Size 2, using 135 yds of Dyeing Wishes Yarn Co. Winter Worsted as MC, and 98 yds of Dyeing Wishes Yarn Co. Winter Worsted as CC
Hook size(s): 3.5 mm; 4.5 mm
Mods: None.
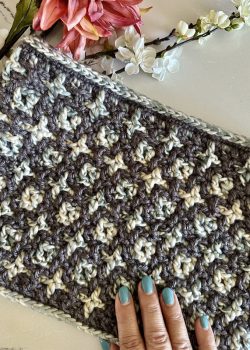

Nicole (handmdebyyarnmama on Ravelry)
Size 1, using 120 yds of Furls Crochet Wander Yarn in Cobblestone Colorway as MC, and 135 yds of Yarn Bee Wildstreak in River Stone Colorway as CC
Hook size(s): 5.5 mm
Mods: I changed the finishing rows to the CC yarn color as I ran out of the main color.
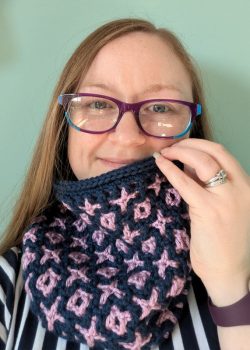

Clare (mrsmcg2008 on Ravelry)
Size 1, using 153 yds of Caron Simply Soft as MC, and 87 yds of Caron Simply Soft as CC
Hook size(s): 5.5 mm
Mods: None.
A word from my testers
The pattern
Construction
This cowl is worked from the top, down in the round and on the right side only. You alternate between the two contrasting colors each round. Three decorative rounds are then worked around both ends of the cowl in order to give it a professional finish.
General notes
- The pattern uses standard US terminology.
- The pattern is written for 3 sizes as follows: 1 (2, 3).
- The pattern uses brackets to mark smaller stitch repeats [like this]. The symbol * is used to mark the beginning of a larger repeat sequence.
- Stitch counts are given in brackets at the end of the round. If no stitch count is given, it is the same as the previous round.
- 1 DC counts as 1 ST. 1 CH-1-sp counts as 1 ST. The beg-CH-4 counts as 1 DC and 1 CH-1-sp.
- When instructed to SLST in top of first DC to join, SLST in the 3rd chain stitch of the beginning chain, inserting your hook through both front and back loops of the chain.
Reversible
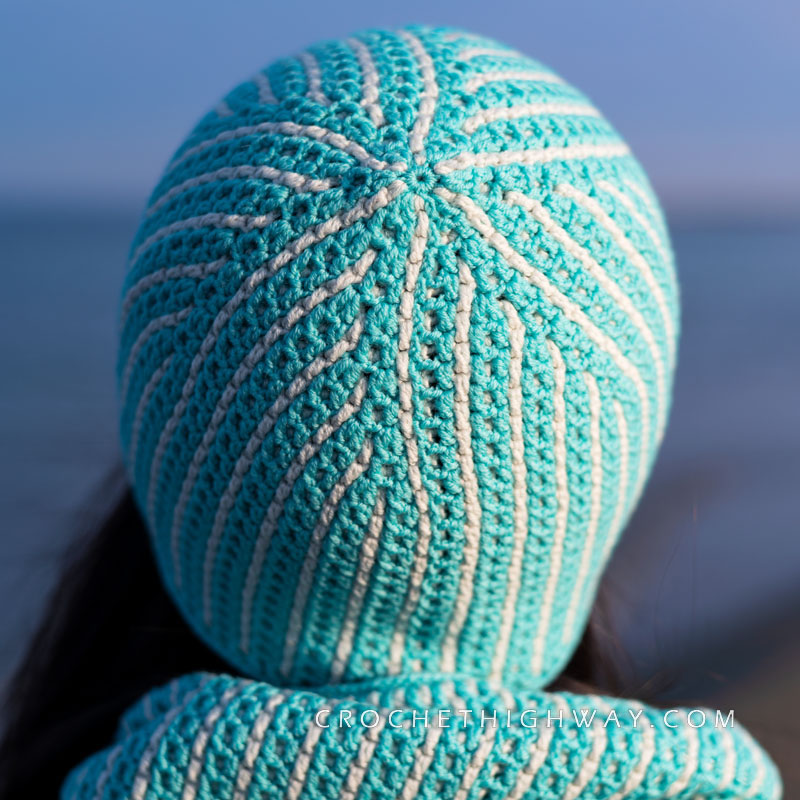
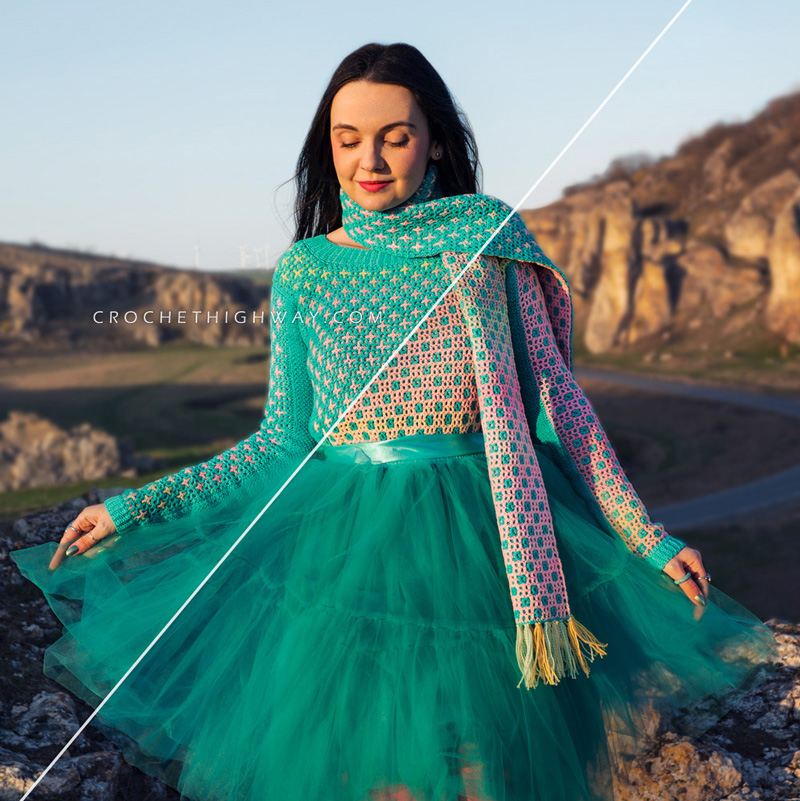
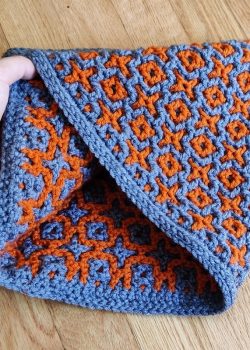
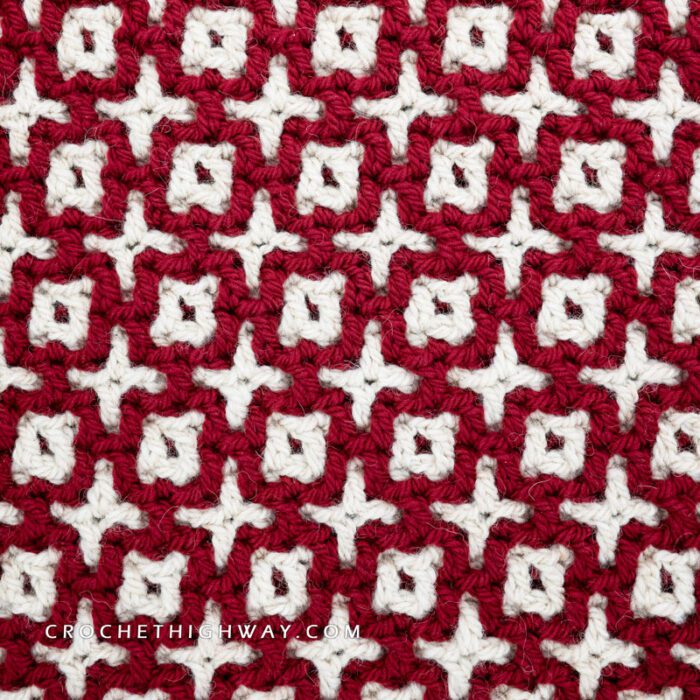
This cowl is reversible. On the right side the main color is dominant, while on the wrong side the contrast color is dominant.

Join my Facebook support Group
I proud myself with writing ultra-detailed patterns for you, so that your crocheting experience is as smooth and seamless as possible. But whenever you have a pattern related question, my Facebook support group is the place to ask. There you can also share your WIPs and brag about your FOs with the community!
Stitch glossary
beg | beginning |
beg-CH-4 | beginning chain 4 |
CC | contrast color |
CH | chain |
CH-1-sp | chain 1 space |
DC | double crochet |
hk | hook |
lp(s) | loop(s) |
MC | main color |
prev | previous |
rem | remain(s) |
rep | repeat |
rnd(s) | round(s) |
RS | right side |
SC | single crochet |
SK | skip |
SLST | slip stitch |
sp | space |
ST(s) | stitch(es) |
WS | wrong side |
YO | yarn over |
Special Stitches
- F: DC in next DC or SC in front of prev rnd, CH 1.
- B: DC in next DC or SC behind prev rnd, CH 1.
- YOSLST (yarn over slip stitch): YO, insert hk through indicated lp and pull up a lp, pull this lp though rem 2 lps on hk. See a photo and video tutorial here.
- BTLO (back third loop only): Also known as the “TLO” (third loop only). In this pattern, the last edging rnd is worked in the BTLO of the YOSLSTs from the previous rnd. Since you are working on the RS and in the stitches of a rnd which was also worked on the RS, the back third loop of the YOSLST will appear farthest away from you, sitting on the WS of your work, behind the two usual front and back loops of the YOSLST. To work in the BTLO, insert hk from top to bottom in a downwards motion. See a photo and video tutorial here.
Gauge
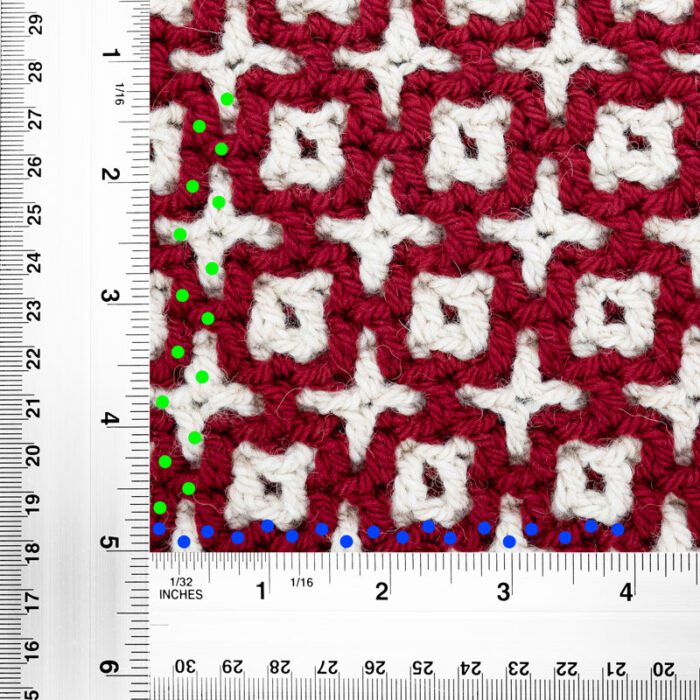
18 STs and 16 rounds per 4 x 4 inches (10.16 by 10.16 cm) (blocked)
Complete the gauge swatch following the directions below and block it the same way you would block your cowl. The sample was wet blocked. Take measurements from the center of your swatch. See my in-depth guide on how to block your crochet items.
Gauge swatch directions
1. SETUP ROUNDS
With your 6.0 mm (main gauge) hk and MC, CH 42 (or a multiple of 6). Without twisting the chain, SLST in back bump of first CH to form a ring.
Setup rnd 1 (MC): CH 1 (does not count as ST here and throughout), SC in back bump of joining CH and of each CH around. SLST in top of first SC to join. [42 SC]
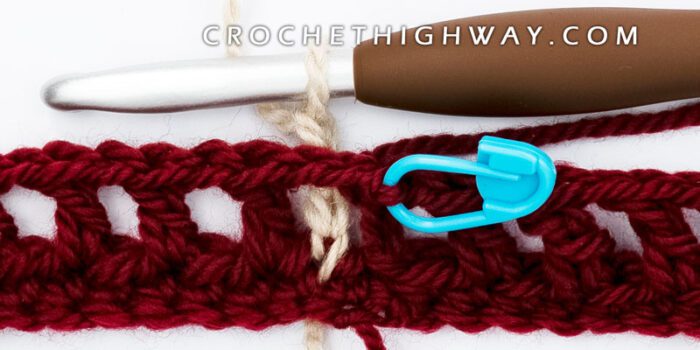
Setup rnd 2 (MC): CH 4 (counts as DC and CH-1-sp here and throughout), SK and place marker in next SC, *DC in next SC, CH 1, SK next SC, rep from * around, SLST in top of first DC to join. Drop MC on the RS. [42 ST]
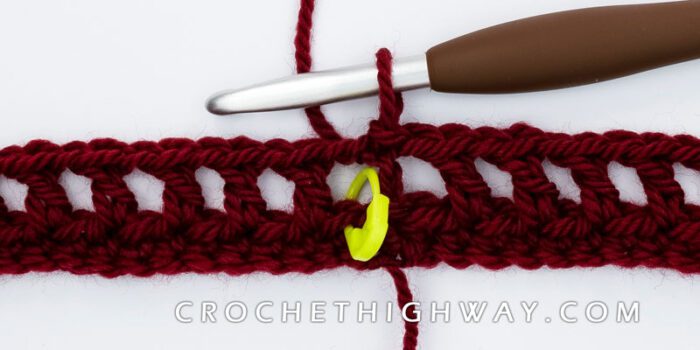
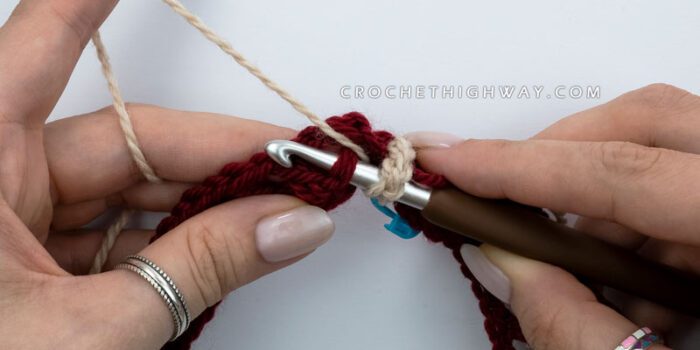
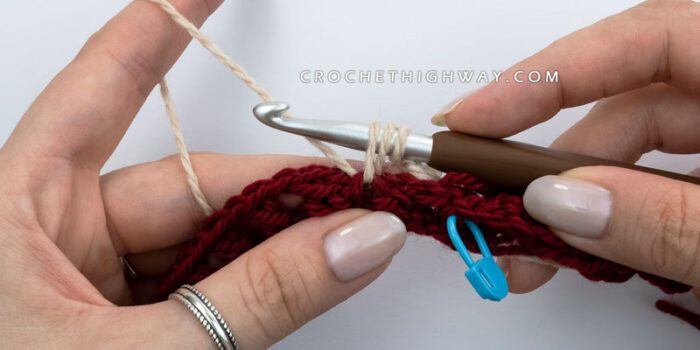
Working behind prev rnd, join CC via SLST in marked SC and remove marker.
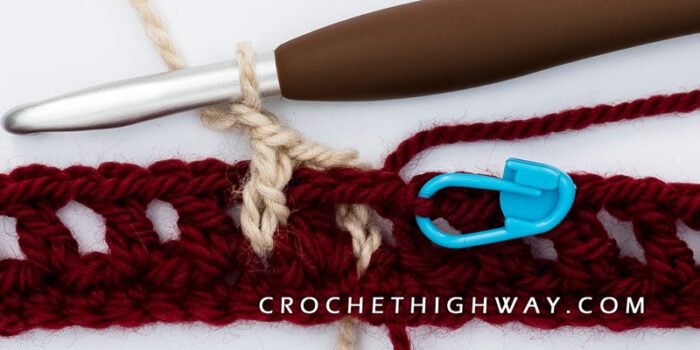
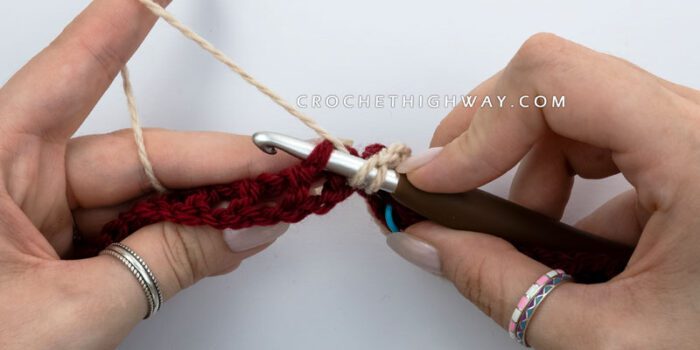
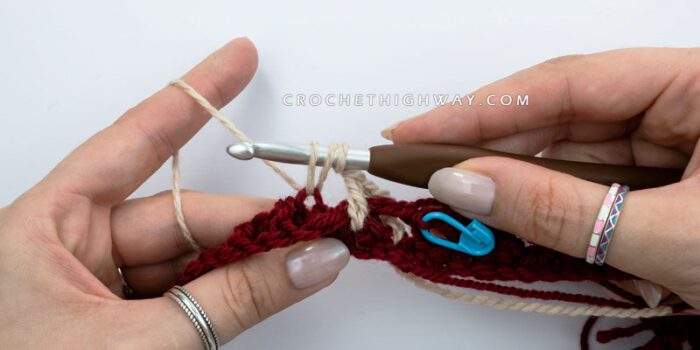
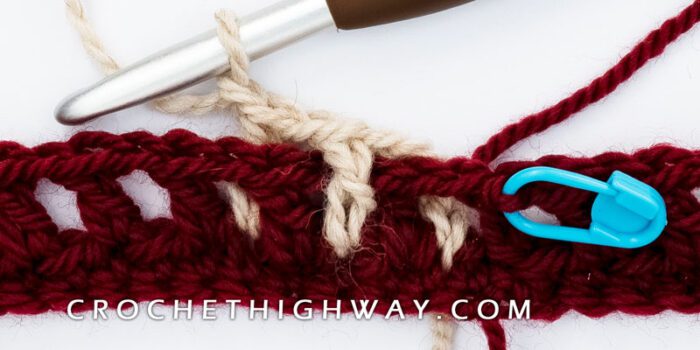
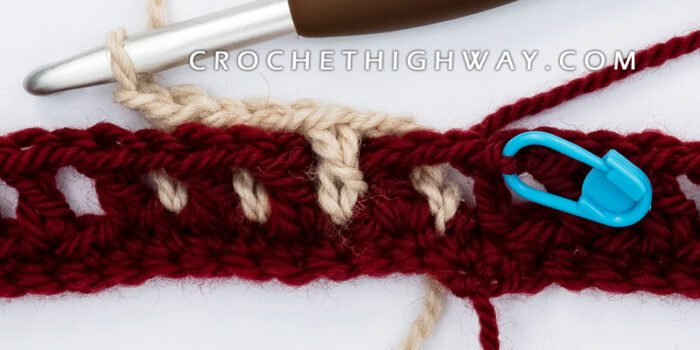
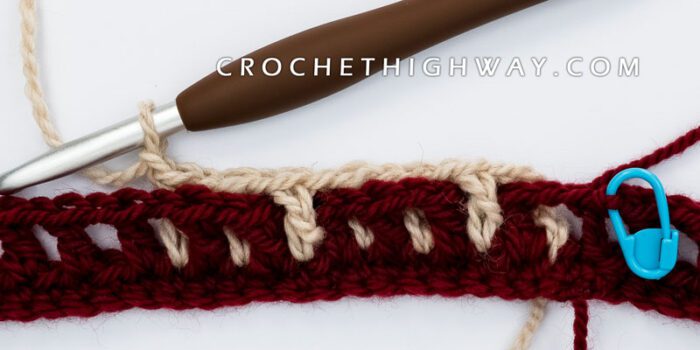
Setup rnd 3 (CC): Work entire rnd in SCs from 2 rnds below, skipping the DCs from prev rnd. Behind prev rnd, CH 4. [1F, 2B] around until 2 empty SC rem. 1F, 1B. Behind MC yarn, SLST in top of first DC to join. Drop CC on the WS.
2. PATTERN REPEAT
Rnd 1 (MC): In front of prev rnd, CH 4. [2B, 1F] around until 2 DC rem. 2B. In front of CC yarn, SLST in top of first DC to join. Drop MC on the WS.
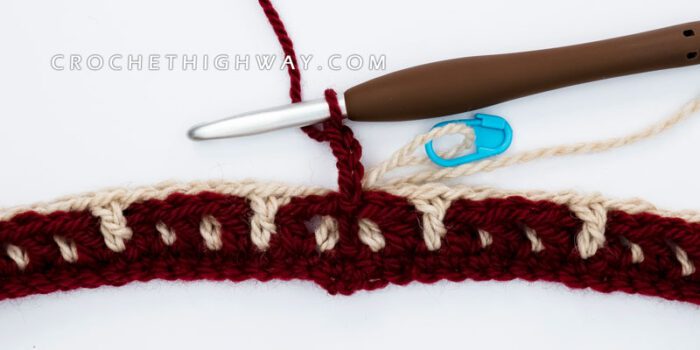
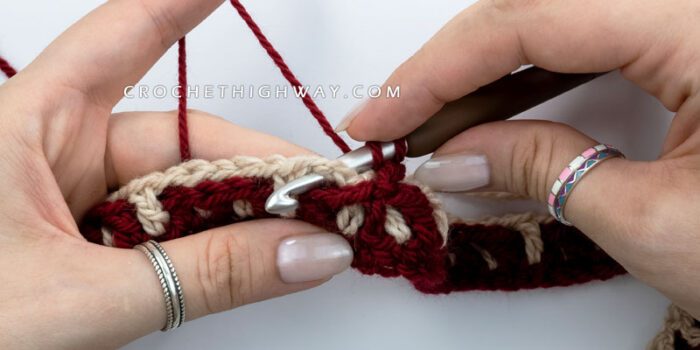
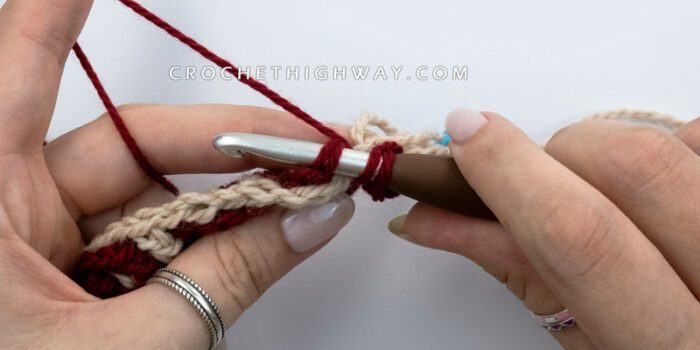

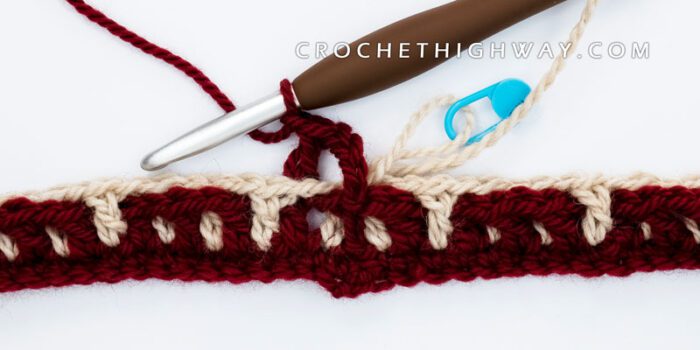

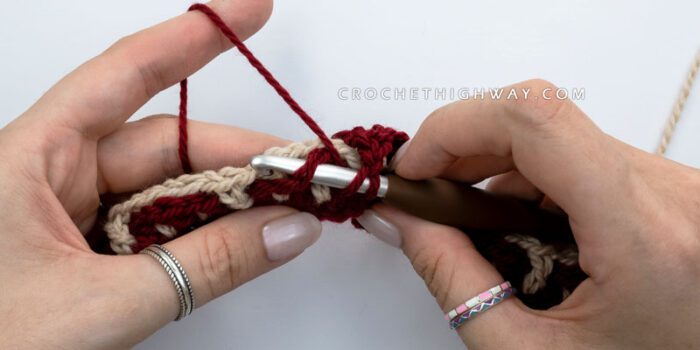
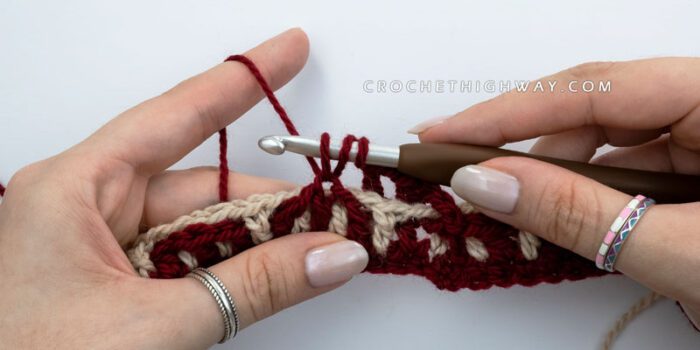
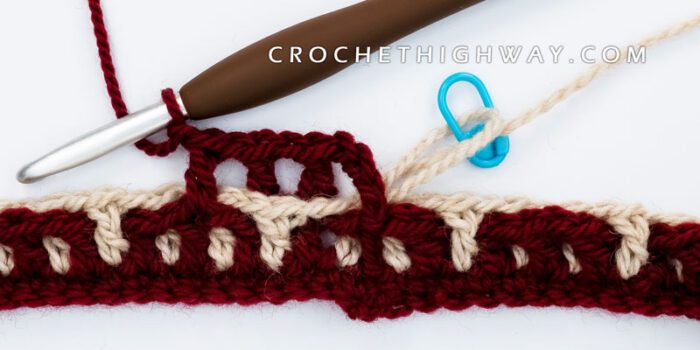
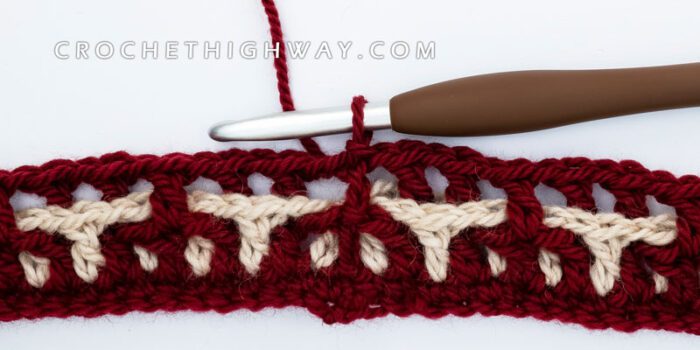
Rnd 2 (CC): Behind prev rnd, CH 4. [1F, 2B] around until 2 DC rem. 1F, 1B. In front of MC yarn, SLST in top of first DC to join. Drop CC on the RS.
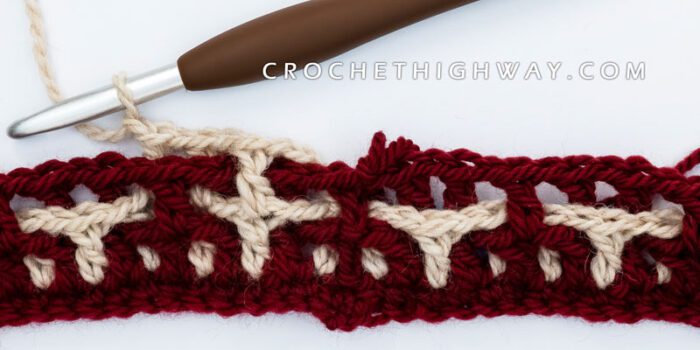
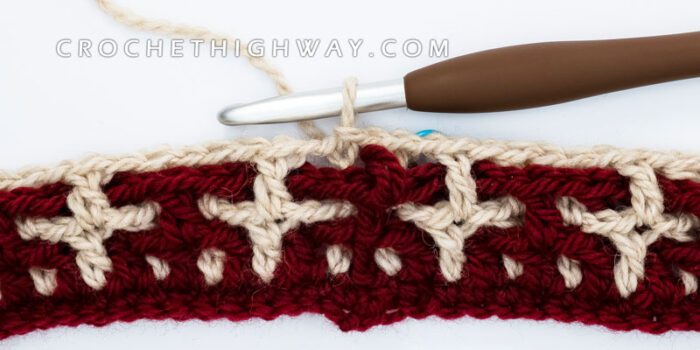
Rnd 3 (MC): Behind prev rnd, CH 4. [2F, 1B] around until 2 DC rem. 2F. Behind CC yarn, SLST in top of first DC to join. Drop MC on the WS.

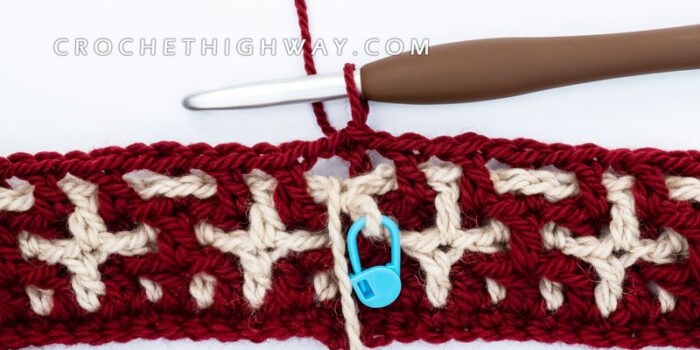
Rnd 4 (CC): In front of prev rnd, CH 4. [1B, 2F] around until 2 DC rem. 1B, 1F. In front of MC yarn, SLST in top of first DC to join. Drop CC on the WS.
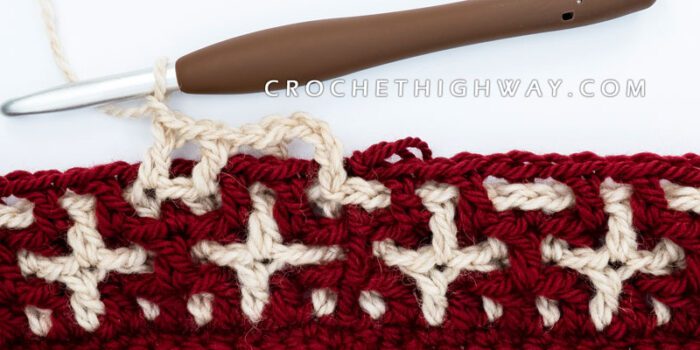
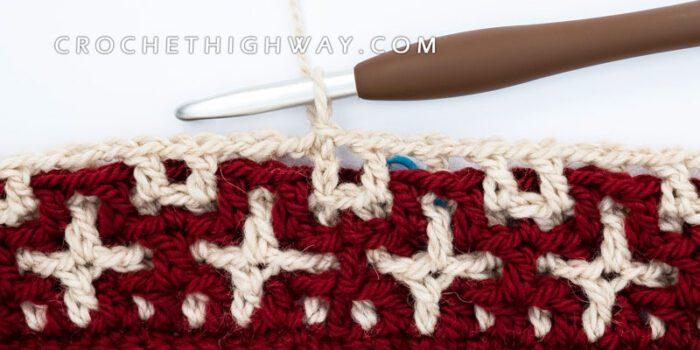
Rnd 5 (MC): Behind prev rnd, CH 4. [2F, 1B] around until 2 DC rem. 2F. In front of CC yarn, SLST in top of first DC to join. Drop MC on the RS.
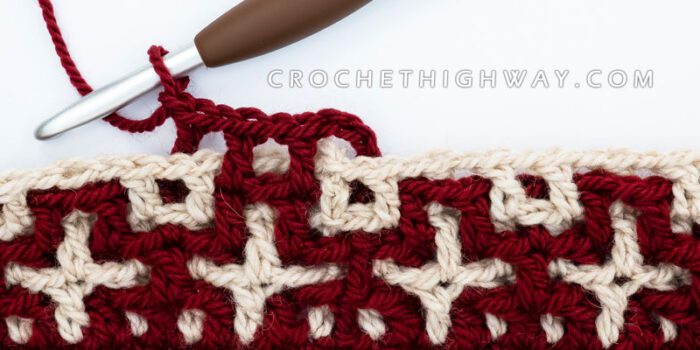
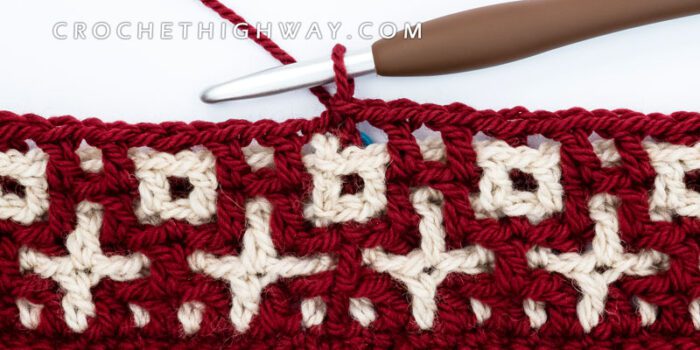
Rnd 6 (CC): Behind prev rnd, CH 4. [1F, 2B] around until 2 DC rem. 1F, 1B. Behind MC yarn, SLST in top of first DC to join. Drop CC on the WS.
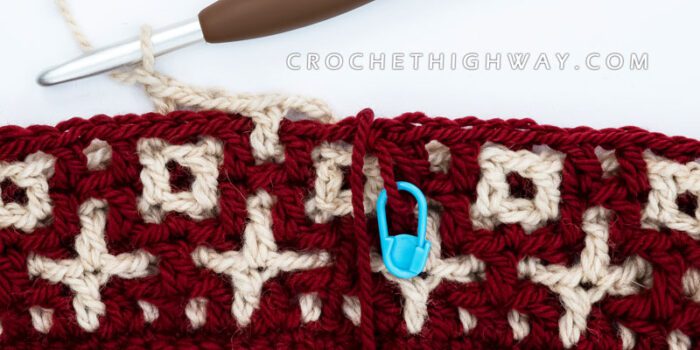
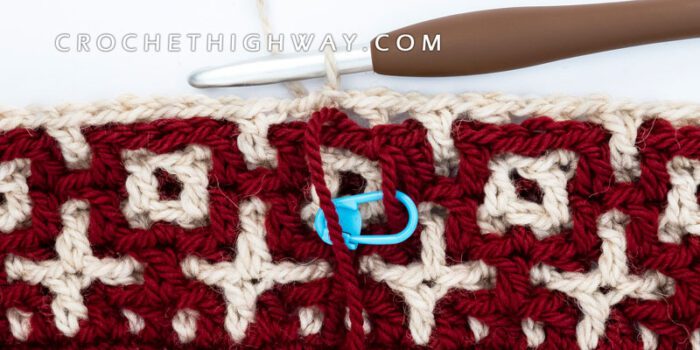
Rep rnds 1-6, x2 more times. You now have 21 rnds including the setup rnds. Block your swatch the same way you would block your cowl and take measurements from the center.
Cowl Directions
1. MAIN PATTERN
Following the directions as laid out in “Gauge Swatch Directions”:
With your 6.0 mm (main gauge) hk and MC, CH 96 (102, 114) (or a multiple of 6). Without twisting the chain, SLST in back bump of first CH to form a ring. Rep setup rnds 1-3 once, then rep rnds 1-6, x4 (5, 6) times. You now have 27 (33, 39) rnds including the setup rnds. Go to Last rnds.
Here are the written directions for rnds 1-6 without the tutorial photos:
Rnd 1 (MC): In front of prev rnd, CH 4. [2B, 1F] around until 2 DC rem. 2B. In front of CC yarn, SLST in top of first DC to join. Drop MC on the WS. [96 (102, 114) ST]
Rnd 2 (CC): Behind prev rnd, CH 4. [1F, 2B] around until 2 DC rem. 1F, 1B. In front of MC yarn, SLST in top of first DC to join. Drop CC on the RS.
Rnd 3 (MC): Behind prev rnd, CH 4. [2F, 1B] around until 2 DC rem. 2F. Behind CC yarn, SLST in top of first DC to join. Drop MC on the WS.
Rnd 4 (CC): In front of prev rnd, CH 4. [1B, 2F] around until 2 DC rem. 1B, 1F. In front of MC yarn, SLST in top of first DC to join. Drop CC on the WS.
Rnd 5 (MC): Behind prev rnd, CH 4. [2F, 1B] around until 2 DC rem. 2F. In front of CC yarn, SLST in top of first DC to join. Drop MC on the RS.
Rnd 6 (CC): Behind prev rnd, CH 4. [1F, 2B] around until 2 DC rem. 1F, 1B. Behind MC yarn, SLST in top of first DC to join. Drop CC on the WS.
Last rnd 1 (MC): In front of prev rnd, CH 4. [2B, 1F] around until 2 DC rem. 2B. In front of CC yarn, SLST in top of first DC to join. Drop MC on the RS.
Last rnd 2 (CC): Behind prev rnd, CH 4. [1F, 2B] around until 2 DC rem. 1F, 1B. Behind MC yarn, SLST in top of first DC to join. Fasten off CC.
Last rnd 3 (MC): In front of prev rnd, CH 4. 1F around. In front of CC yarn, SLST in top of first DC to join.

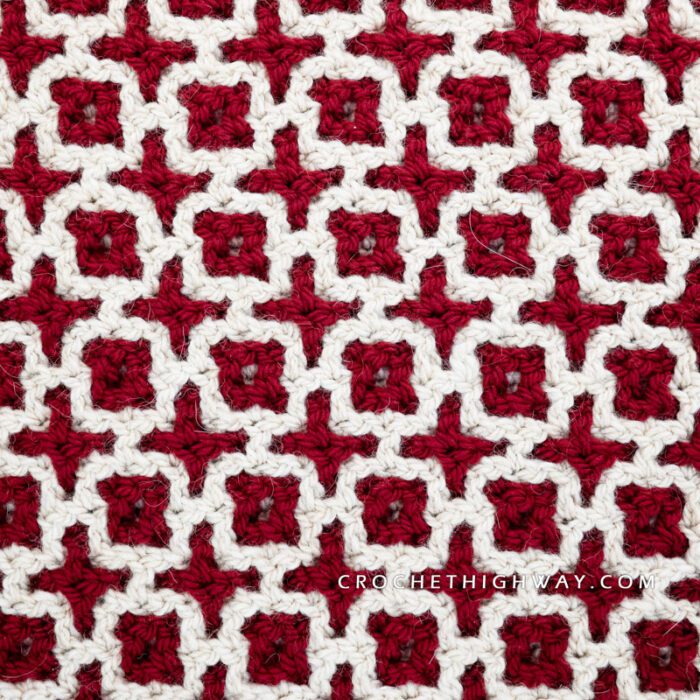
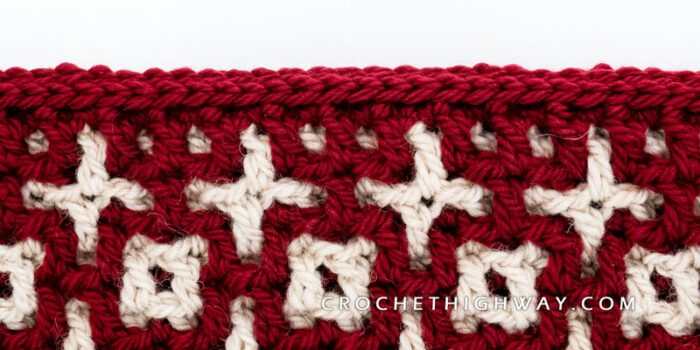
You now have a total of 30 (36, 42) rnds, including the setup rnds and the last rnds.
Explore more interlocking crochet patterns…
Check out my collection of interlocking crochet patterns for garments, accessories, and home decor!
2. FINISHINGS
You’ll now work a set of decorative rounds around both ends of the cowl. These rounds are not joined. Use marker to keep track of beginning of rnd.
2.1 Upper Edge
Switch to your 5.0 mm (detailing) hk and continue from where you left off. Round 1 will join both layers of fabric together. Rounds 2 and 3 will provide the cowl with a professional finish.
Recall that 1 DC counts as 1 ST and 1 CH-1-sp counts as 1 ST.
Rnd 1 (MC): CH 1 (does not count as ST here and throughout), *SC in next ST from prev rnd and the corresponding ST from 2 rnds below together, rep from * around. Do not join.
Rnd 2 (MC): YOSLST around. Do not join.
Rnd 3 (MC): SLST in BTLO of each YOSLST around.
Fasten off MC.
2.2 Lower Edge
Continue working with your 5.0 mm (detailing) hk. Rotate your cowl to start working in the foundation chains.
With RS of your work facing you, join MC via SLST in both empty lps of any foundation CH.
Rnd 1 (MC): YOSLST in both empty lps of same CH as join and of each CH around. Do not join.
Rnd 2 (MC): SLST in BTLO of each YOSLST around.
Fasten off MC.
Weave in all ends and block according to fiber. Sample was wet blocked and laid flat to air dry.
Read more on how to block your crochet garments and accessories in my free comprehensive guide.
***
I hope you enjoyed making this cowl as much as I enjoyed designing it! I’d love to see your work, so please tag me on Instagram or Ravelry if you’re on those platforms!
Thirsty for more? Why not check out some of my recently published crochet patterns and tutorials:


