Purchase the ad-free, timestamped P D F version 


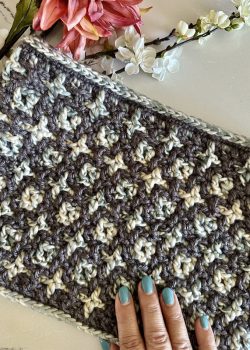


This pattern is absolutely gorgeous! The gauge swatch directions have so many helpful pictures to really understand how the pattern looks and should work up. The gauge swatch is the perfect practice for the pattern that the cowl itself worked up very quickly. I also loved that the main pattern also includes the instructions without all the pictures, which was a great reference as I worked. Thank you so much for allowing me to test!

Nicole (hookedontracey on Ravelry)
Amazing pattern to form an intricate looking design. The instructions were easy to follow with plenty of photos to assist as well. Check your tension often, I think it's harder to maintain with the switching yarn! Totally on me for not checking more often. Can't wait to wear it.

Clare (mrsmcg2008 on Ravelry)