DIY: How to make crochet hook size labels with this free downloadable template
& never ever forget which hook size you were using
Disclaimer: Some links on this page are affiliate links. This means that, if you click through the links and make a purchase, I will earn a small commission at no additional cost to you.

Have you ever worked on a crochet project before, set it aside for a while, only to completely forget what hook size you used on it? Or maybe you’ve been swatching for a new pattern test and can’t remember which hook size you meet gauge with?
You are not alone. I used to write the hook size for my projects and swatches on small pieces of paper and attach those to the fabric, but you know how it goes with disposable pieces of paper. They get lost and they’re also not very pretty to look at.
Enter, your DIY set of crochet hook sizes! If you’re into crafts like I am, you probably already have all the supplies needed just sitting in your arsenal.
Let's get started, shall we?
Supply list
I’ve broken down the supply list into 2 sections:
1) must-haves: a list of things you absolutely need for this DIY project, and
2) nice-to-haves: a list of things that are not mandatory but have the potential to bring your project to the next level.
1) Must-haves
- printer – I don’t have a color printer, so I designed this to work for black & white printers;
- cardboard paper – mix it up by using different colors! Generally, for your labels to be as durable as possible, the thicker the better when it comes to cardboard paper. Make sure your printer can take it though;
- scissors;
- hole puncher – a regular office hole puncher is perfect, I’ll show you how I punched the holes with precision;
- safety pins or other type of clasp to pin your label with;
- the printable PDF template, available as a free download when subscribing with your email address below 👇🏻
2) Nice-to-haves
If you wanna be a bit over-the-top like me, you’re also gonna need:
- a laminating machine and laminating pouches to make your labels pretty much last forever;
- a paper trimmer to batch cut the labels;
- brass eyelets and setting pliers to give the hole a finishing touch;
- for bonus points, colored markers to color-code the labels.

NOTE: The printable template also includes US crochet hook sizes!
How I made my crochet hook size labels:
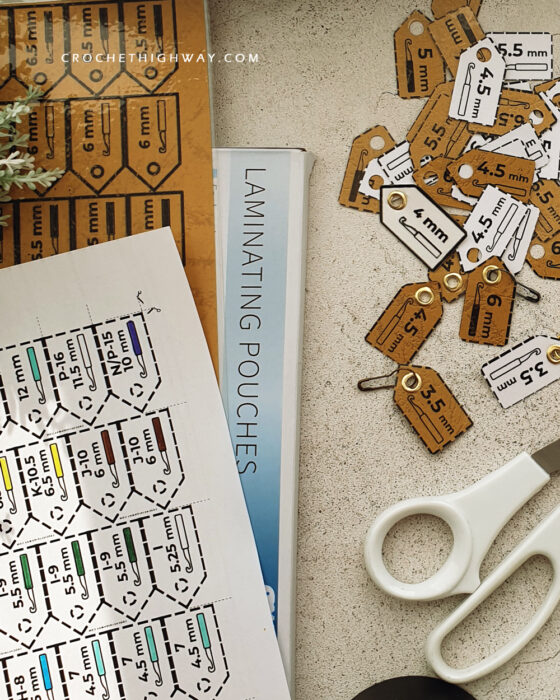
(1) Download the PDF template and print it out.
(2) Color in the small hook symbols using your preferred color scheme. I used the Clover Amour colors since I know that color scheme by heart!
(3) Laminate the sheet, you know you want to.
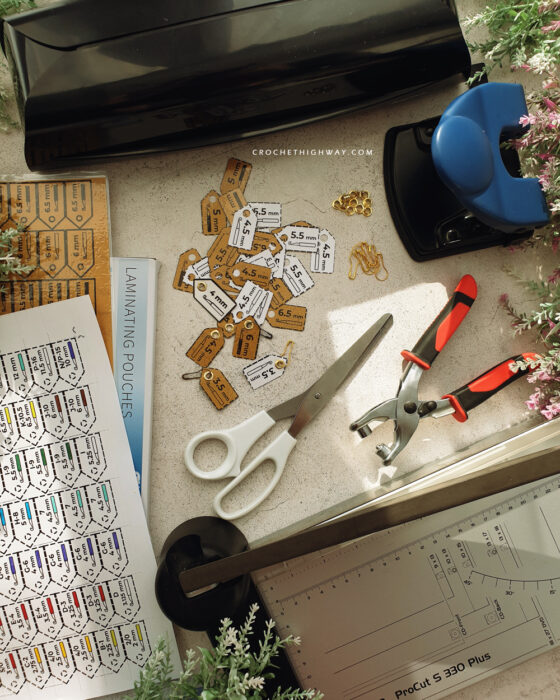
(4) Cut out the label shapes. I used my paper trimmer to batch cut all the labels into rectangles, and then used my scissors to manually cut out the pointy end.
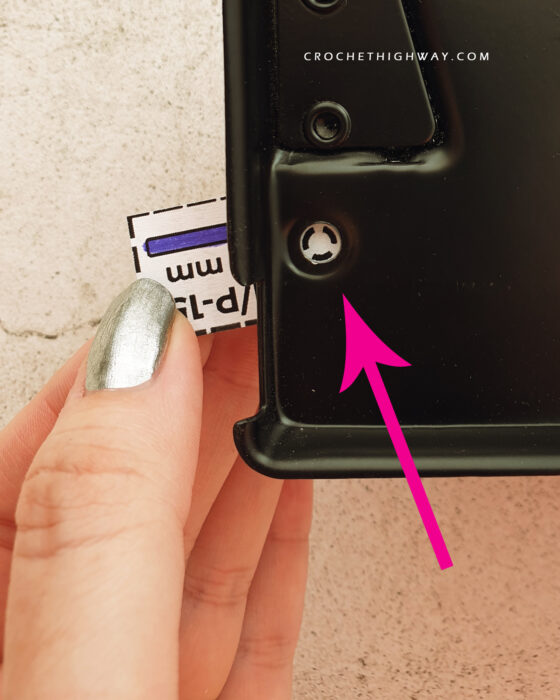
(5) Punch the hole for your pin to go through. Take your hole puncher and take out the bottom cover. This allows you to see exactly where the circular blade is, making it possible to perfectly align the small circle on the label to the puncher blade.


(6) Secure the hole with those fancy brass eyelets you have lying around for that special DIY project. This is that project.
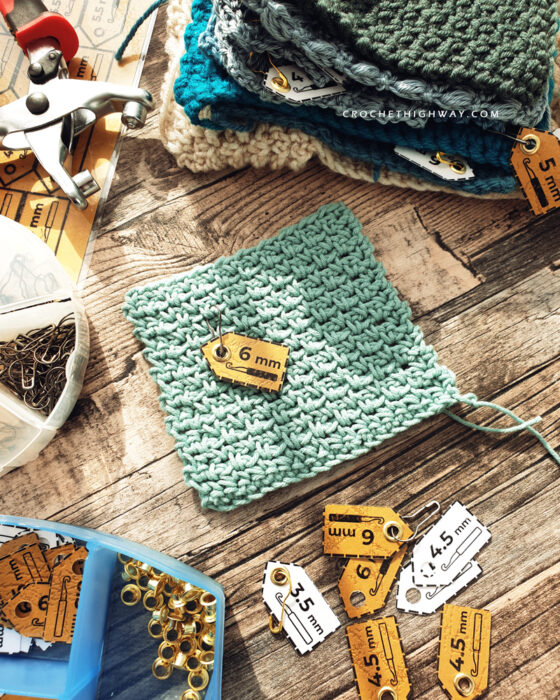
(7) Attach your pins to the labels and ta-daa! Your new set of labels is ready to use and you will never ever forget what hook size you need for that year-long WIP. Your future you will thank you!
I hope you enjoy making these crochet hook size labels. If you share on social media, don’t forget to tag me @CrochetHighway ’cause I’d love to see what you make!

Thirsty for more? Why not check out some of my recently published crochet patterns and stitch tutorials: