How to crochet the linked double crochet stitch
A crochet stitch tutorial

Disclaimer: Some links on this page are affiliate links. This means that, if you click through the links and make a purchase, I will earn a small commission at no additional cost to you.
The linked double crochet stitch is a useful technique when you need to create a fabric with little to no gaps. The linked double crochet stitch (LDC) has the same height as the regular double crochet, but it’s similar to a single crochet in terms of density. However, it isn’t as stiff as a piece of fabric made entirely in SC, as it retains the drape of the regular DC.
Step by step tutorial
This photo tutorial uses standard US crochet terminology.
Step 1. Start with a foundation chain. I started with a CH 17, but you can start with any length you want (photo 1).
Step 2. Insert hook through second CH from hook and pull up a loop (photo 2).
Step 3. Insert hook through third CH from hook and pull up a loop (photo 3).
Step 4. Yarn over (YO), pull through first 2 loops on the hook (photo 4).
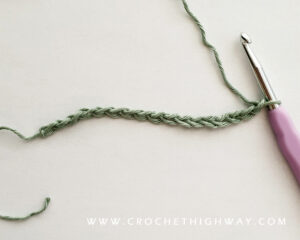
Photo 1
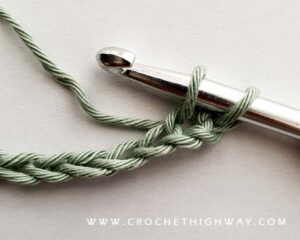
Photo 2

Photo 3
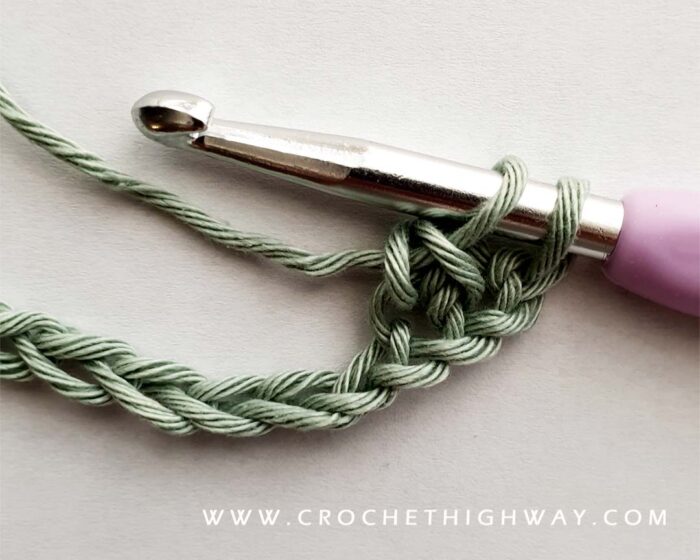
Photo 4
Step 5. YO again and pull through the remaining 2 loops on the hook. You have completed your first LDC (photo 5)!
Now you’re going to create the second LDC.
Step 6. Insert hook through the horizontal bar of the previous LDC stitch (photos 6-7).
Step 7. YO and pull through (photo 8).
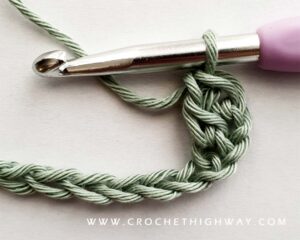
Photo 5
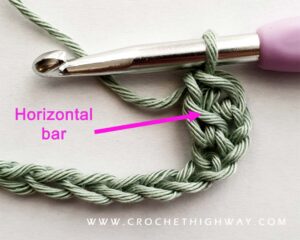
Photo 6

Photo 7
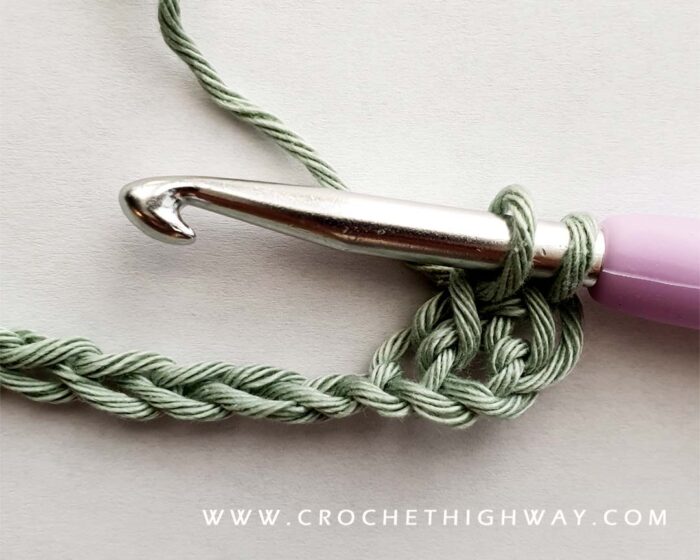
Photo 8
Step 8. Insert hook through next chain, YO and pull through (photo 9).
Step 9. YO and pull through first 2 loops on the hook (photo 10).
Step 10. YO and pull through the remaining 2 loops on the hook. You have completed your second LDC (photo 11)!
Repeat steps 6-10 all the way across (photos 12-13).
Note: The first LDC in a row is going to be a little different than the rest. The first LDC always starts with inserting the hook through the turning chain, while all remaining LDC stitches start by inserting the hook through the horizontal bar of the previous LDC.
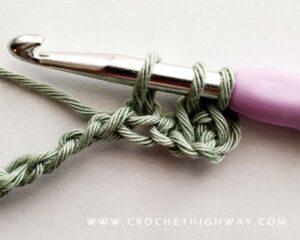
Photo 9
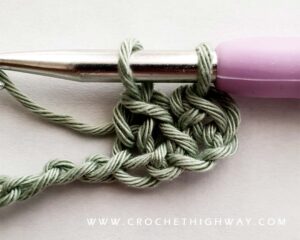
Photo 10
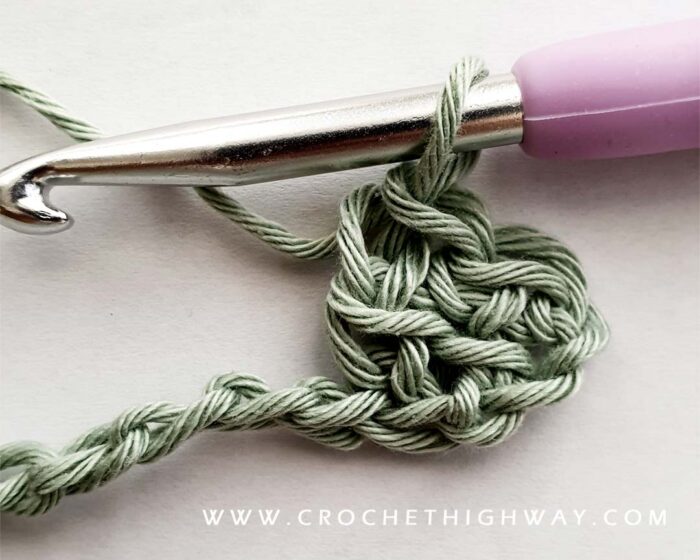
Photo 11
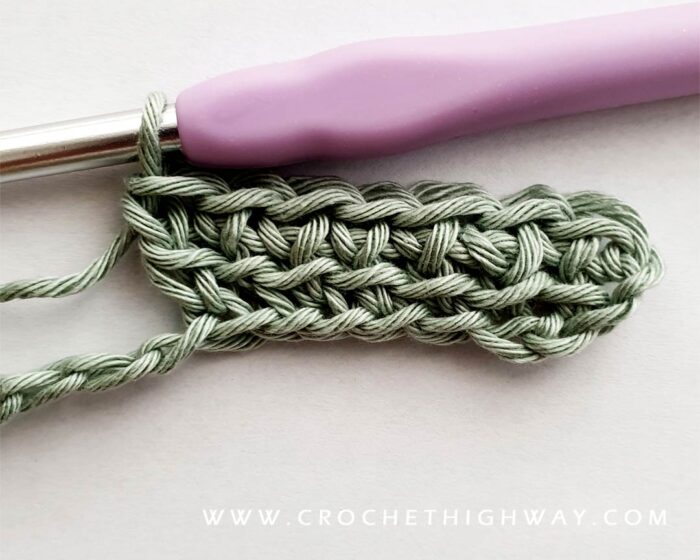
Photo 12
Step 11. CH 2 and turn to start row 2 (photo 14).
Step 12. Insert hook through the first turning chain, YO and pull through (photo 15).
Step 13. Insert hook through next stitch, YO and pull through (photo 16).
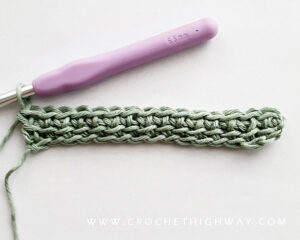
Photo 13
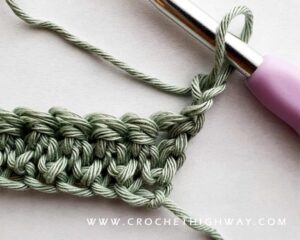
Photo 14
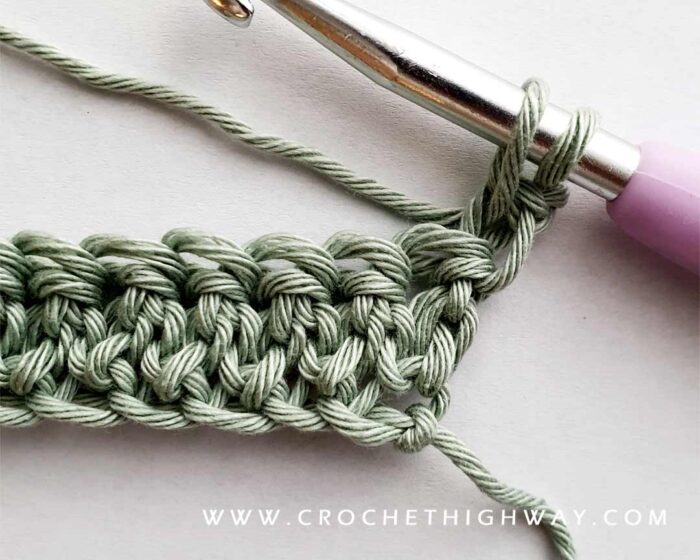
Photo 15
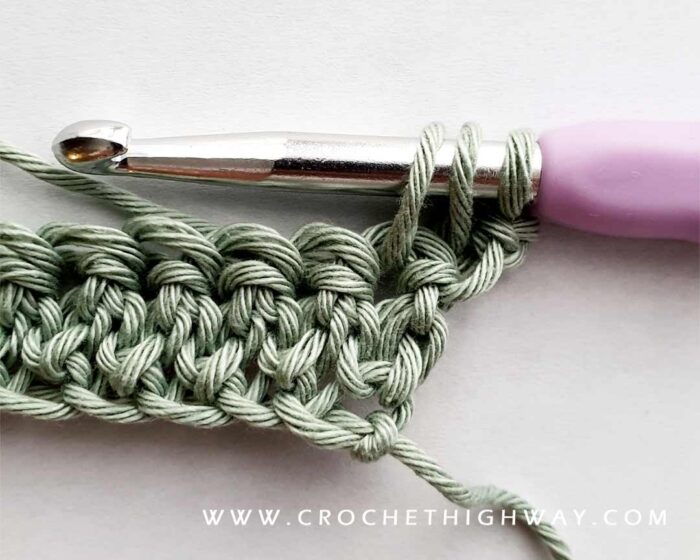
Photo 16
Step 14. YO and pull through first 2 loops on the hook (photo 17).
Step 15. YO and pull through the remaining 2 loops on the hook. You have completed your first LDC on the second row (photo 18)!
Step 16. Insert hook through the horizontal bar of the previous LDC stitch (photo 19), YO and pull through (photo 20).
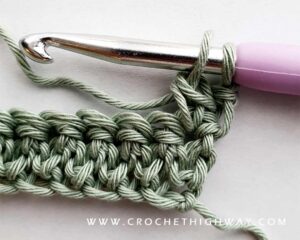
Photo 17
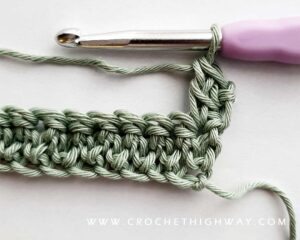
Photo 18
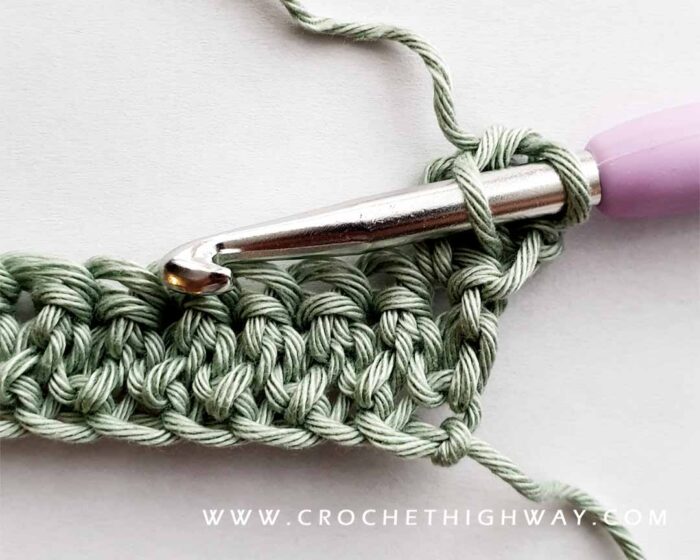
Photo 19
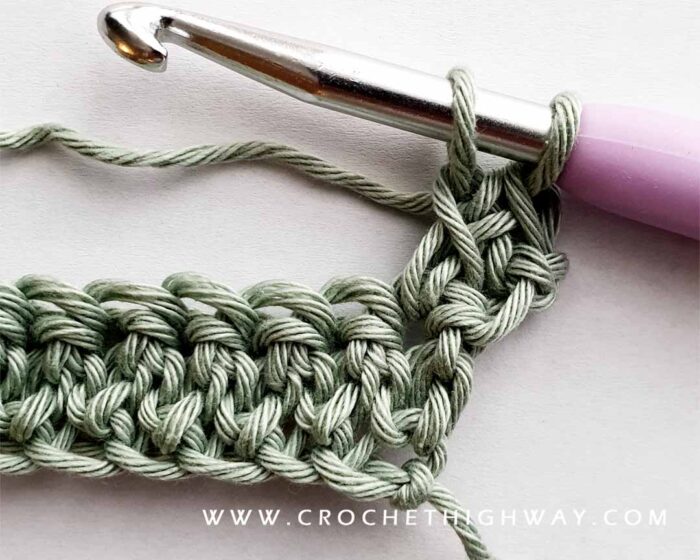
Photo 20
Step 17. Insert hook through next stitch, YO and pull through (photo 21).
Step 18. YO an pull through first 2 loops on the hook (photo 22).
Step 19. YO and pull through the remaining 2 loops on the hook (photo 23).
Repeat steps 16-19 all the way across (photo 24).
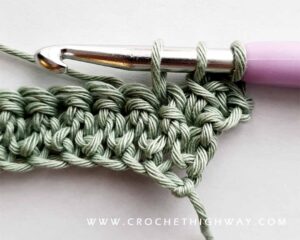
Photo 21
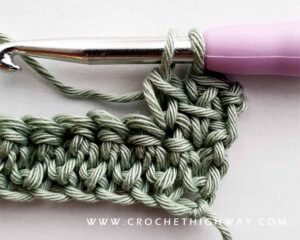
Photo 22
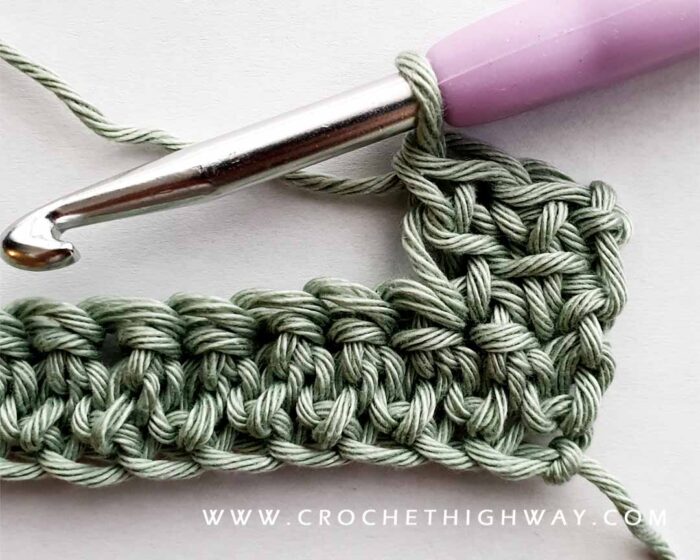
Photo 23
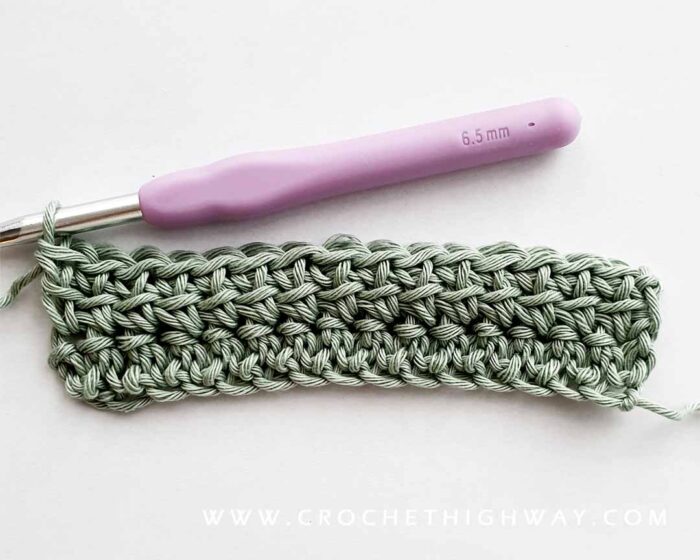
Photo 24
Carry on with your repeats until you reach your desired length. Photos 25-27 show close-ups of the linked double crochet stitch.
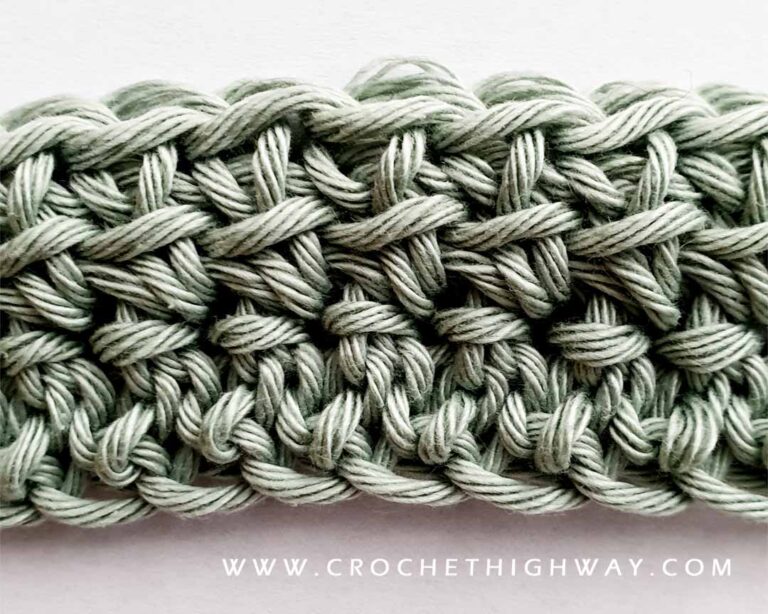
Photo 25
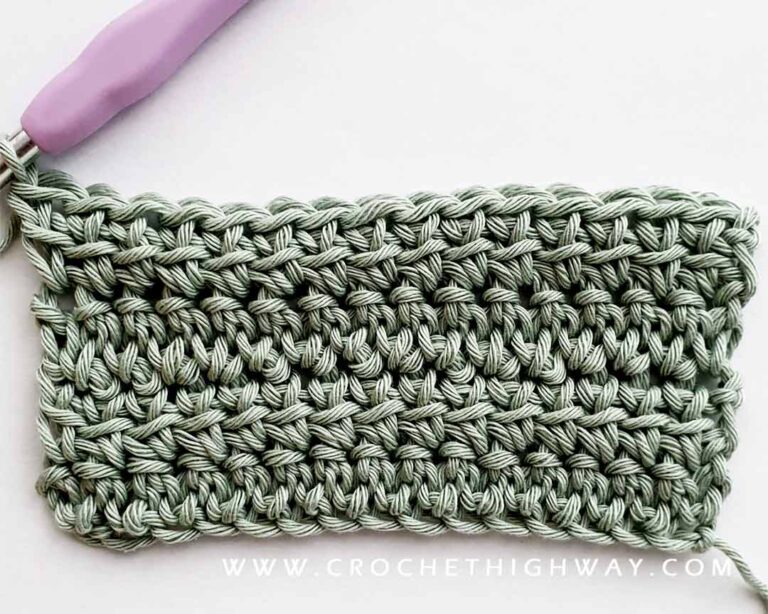
Photo 26
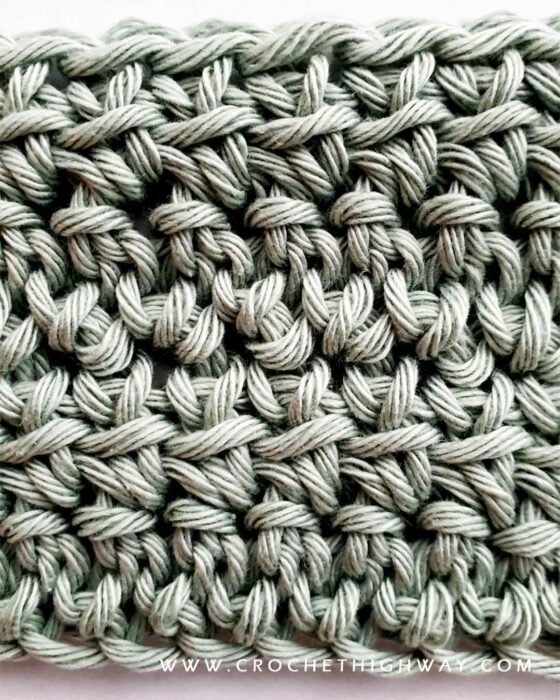
Photo 27
Congratulations, you just learned a brand new stitch to add to your repertoire!
***
Thirsty for more? Check out some of my recently published crochet patterns and stitch tutorials: