Crochet Bead Stitch
A crochet stitch tutorial
Disclaimer: Some links on this page are affiliate links. This means that, if you click through the links and make a purchase, I may earn a small commission at no additional cost to you.
The crochet bead stitch uses multiple wraps of yarn around the hook to create a three-dimensional appearance. The bead stitch looks complicated at first, but it’s actually deceptively simple to complete! Due to the multiple wraps involved, this stitch requires a lot of yarn, so be prepared for that.

The crochet bead stitch is worked over 2 stitches, so work an even number of stitches for your swatch.
This photo tutorial will show you how to crochet the bead stitch with 11 loops on the hook. Other makers may prefer to stop at 9 or even 7 loops, but I like my stitches nice and plump!
This photo tutorial uses standard US crochet terminology.
Step 1: Start with a CH 3 or standing double crochet and double crochet in next stitch (photo 1).

Step 2: *Yarn over (photo 2), insert hook behind the post of the previous double crochet from front to back (photo 3), yarn over and pull up a loop (photo 4).


Step 3: Repeat from * 4 more times (or the number of times necessary to reach the number of loops on the hook required by the pattern). Here, we repeat the wraps 5 times in total, so we have 11 loops on the hook (photos 5-7). Yarn over and pull through the first 10 loops (photo 8).


Step 4: Yarn over and pull through the remaining 2 loops (photo 9). Your first bead stitch is complete.

Step 5: Skip one stitch and double crochet in next stitch (photo 10).

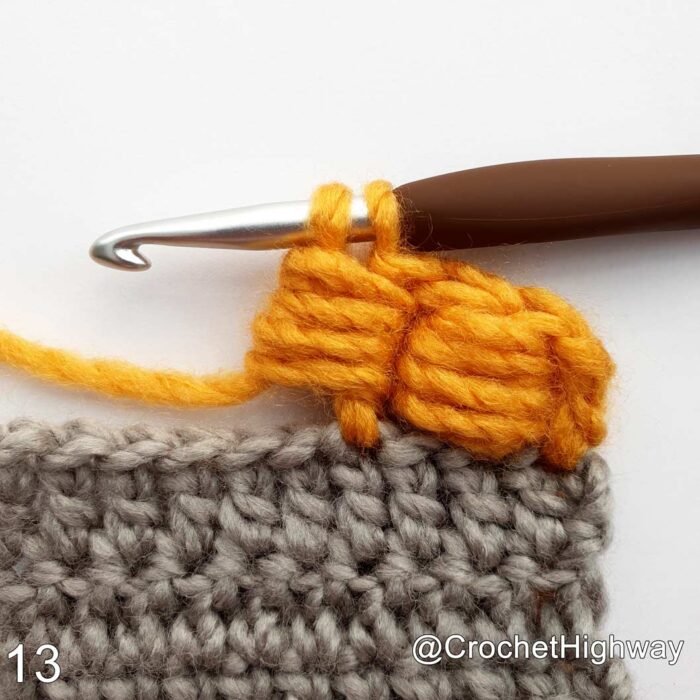
Step 6: Crochet the next bead stitch around the last double crochet stitch you completed (photos 11-14).


Step 7: Repeat the steps above until you reach the end of the row. Finish by working a double crochet stitch in the last stitch (photo 15).

While you’re here, check out some of my recently published crochet patterns!
