The Standing Double Crochet
A crochet stitch tutorial
Disclaimer: Some links on this page are affiliate links. This means that, if you click through the links and make a purchase, I will earn a small commission at no additional cost to you.
The Standing Double Crochet (US terms) or Standing Treble Crochet (UK terms) is a useful technique particularly when starting a new round or joining new yarn, for example when the next round is worked in a different color. This technique makes the first stitch in the round look a lot neater and similar to normal double crochet stitches, unlike the traditional technique with starting CH 3 and SL ST.
This photo tutorial uses standard US crochet terminology.
Step 1: Place the yarn tail at the back of your hook between your pinky and ring finger (photo 1) and hold it in place until you complete the first couple of stitches. Wrap the working yarn around your hook twice (photo 2).


Step 2: Insert your hook in the space indicated in the pattern, yarn over and pull up a loop. You now have 3 loops on the hook (photo 3).

Step 3: Yarn over and pull through the first 2 loops on the hook. You now have 2 loops on the hook (photo 4).
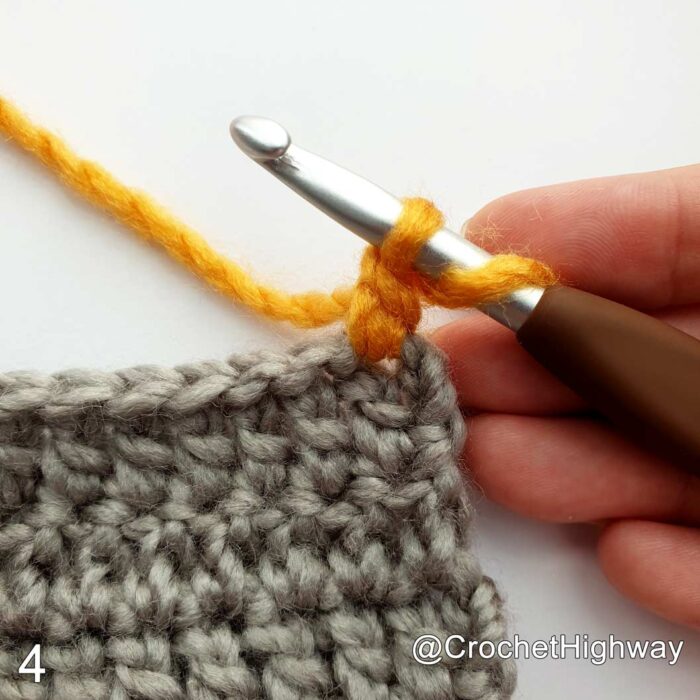
Step 4: Yarn over and pull through the last 2 loops on the hook (photo 5). Your standing double crochet stitch is complete!
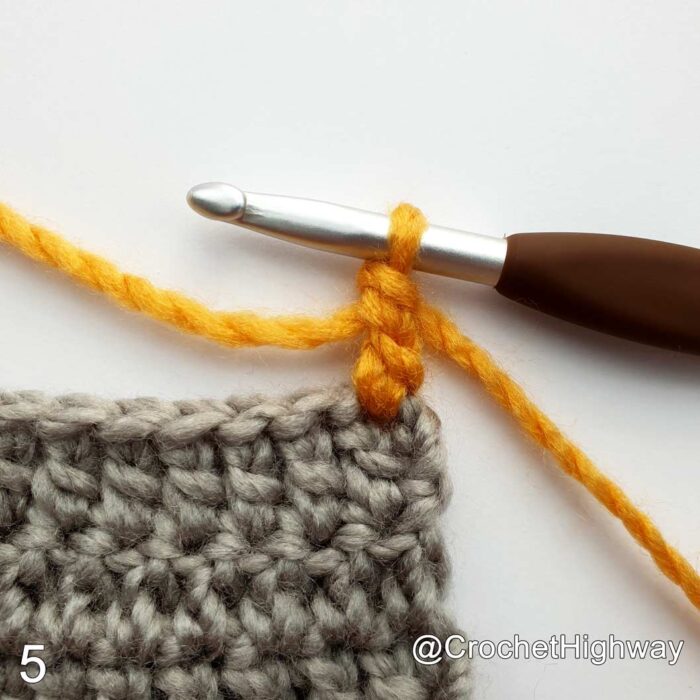
Step 5: Continue holding the yarn tail and complete the next stitch indicated in the pattern.
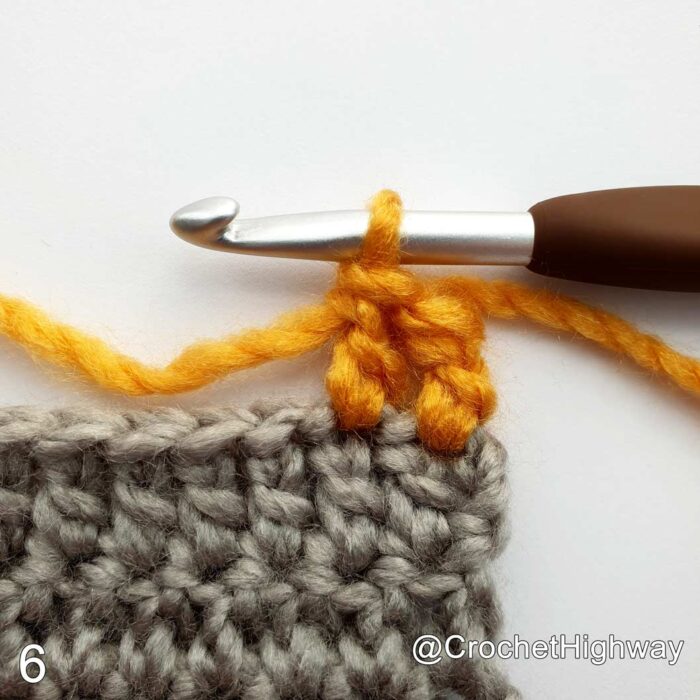
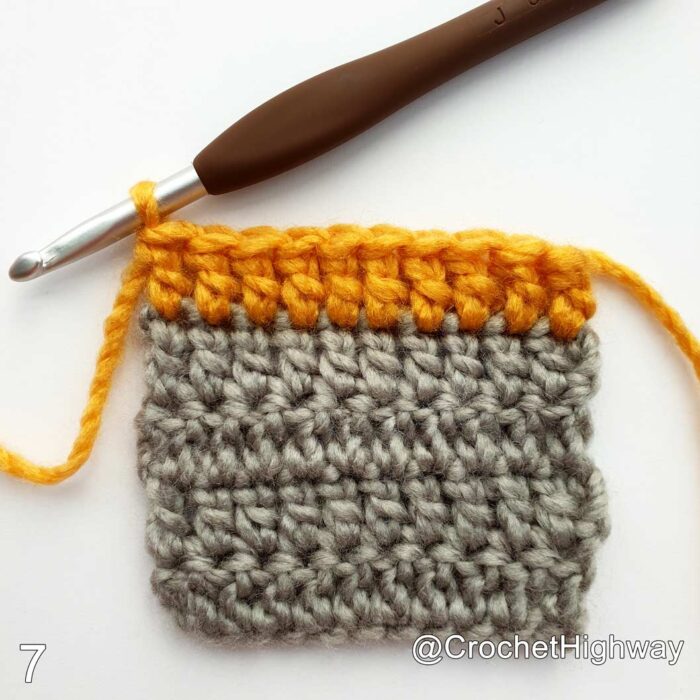
You can now let go of the yarn tail, and continue the pattern as written (photo 7). Weave in ends and your standing double crochet stitch is indistinguishable from the rest of the stitches in the row (photo 8).

While you’re here, check out some of my recently published crochet patterns!
I’d LOVE to see your work, so be sure to shout out to me @CrochetHighway on Instagram and use the #crochethighway hashtag for a chance to be featured on my stories!
Check out my shops and come say hello on Instagram!


